Making a lattice crust for pie always looked complicated to me. I used to think only professional bakers could do it. But after trying it myself a few times, I realized it’s not as hard as it seems. Now, when I want to impress friends or family, I always go for a classic lattice crust. It adds a beautiful touch and lets the filling peek through. If you’ve ever felt nervous about making one, I get it! Let me walk you through how I do it, step by step, with all the tips and small details I wish someone had told me earlier.
What Is A Lattice Crust?
A lattice crust is a pie top made by weaving strips of dough over and under each other. The woven pattern isn’t just pretty—it also lets steam escape, so your filling doesn’t get too soggy. Most people use it for fruit pies like apple, cherry, or blueberry.
But honestly, you can use a lattice for any pie that has a juicy filling.
Ingredients And Tools You’ll Need
Here’s what I use for a standard 9-inch pie.
- Pie dough for a double crust (homemade or store-bought)
- Pie filling of your choice (apple, cherry, or any juicy fruit)
- Rolling pin
- Sharp knife, pizza cutter, or pastry wheel
- Ruler (optional, but helpful)
- Baking sheet
- Pastry brush
- Egg wash (1 egg beaten with 1 tbsp water)
- Sugar for sprinkling (optional)
A Quick Note On Pie Dough
I’ve tried both homemade and store-bought dough. Homemade dough gives a flakier texture, but store-bought works in a pinch. The key is to keep your dough cold. If it gets warm, it tears and stretches.
Step-by-step: How I Make A Lattice Crust
1. Roll Out The Dough
First, I roll out half the dough for the bottom crust and fit it into my pie pan. I chill this in the fridge while I work on the top.
Next, I roll out the other half of the dough into a rough circle, about 1/8-inch thick. I try to keep it as even as possible so the strips bake evenly.
2. Cut Even Strips
Using a sharp knife or pizza cutter, I cut the dough into strips. For most pies, 1/2 to 3/4 inch wide is perfect. I like to use a ruler to keep the strips even, but you can eyeball it if you’re in a hurry.
I usually get 10-12 strips from a 9-inch pie. If you want a tighter weave, use more strips. For a rustic look, use fewer.
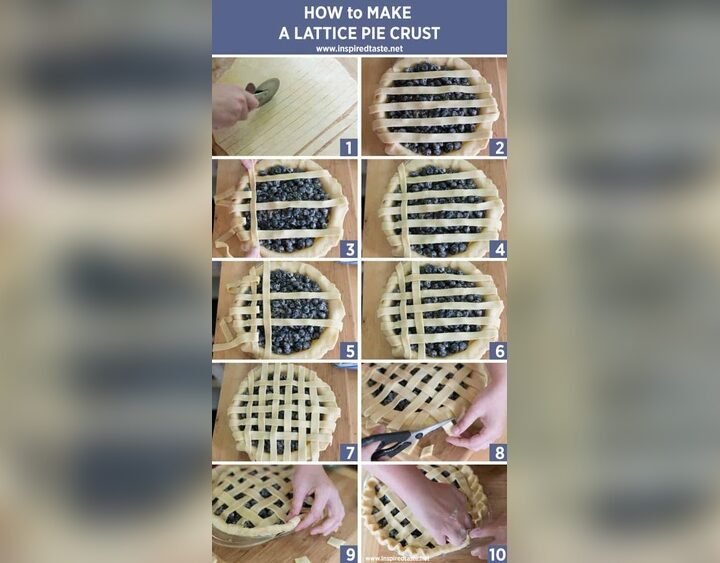
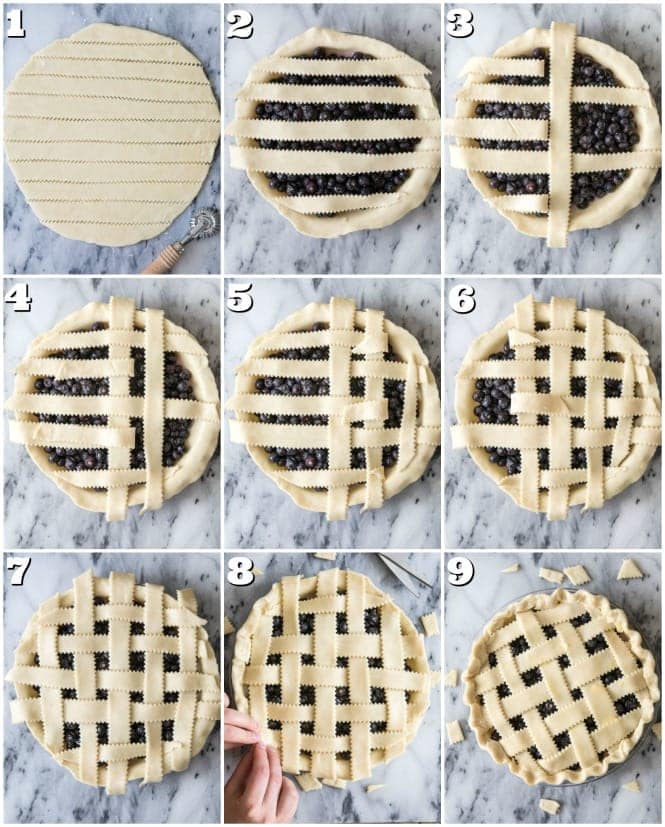
3. Lay Out The First Layer
I place half the strips across the pie, spaced evenly. I let the ends hang over the edge.
4. Weave The Second Layer
Now comes the fun part. I fold back every other strip halfway. Then, I lay a strip of dough perpendicular across the pie. I unfold the folded strips over the new strip.
Next, I fold back the other set of strips and lay down another perpendicular strip. I repeat this process, alternating until the pie is covered.
At first, I messed this up and got confused about which strips to fold. My advice: go slow and adjust as you go. It’s like weaving a basket—there’s a rhythm to it.
5. Trim And Seal The Edges
Once the lattice is done, I trim the overhanging dough, leaving about 1/2 inch. I fold the ends under and press gently to seal. Sometimes I crimp the edge with a fork or my fingers for a pretty finish.
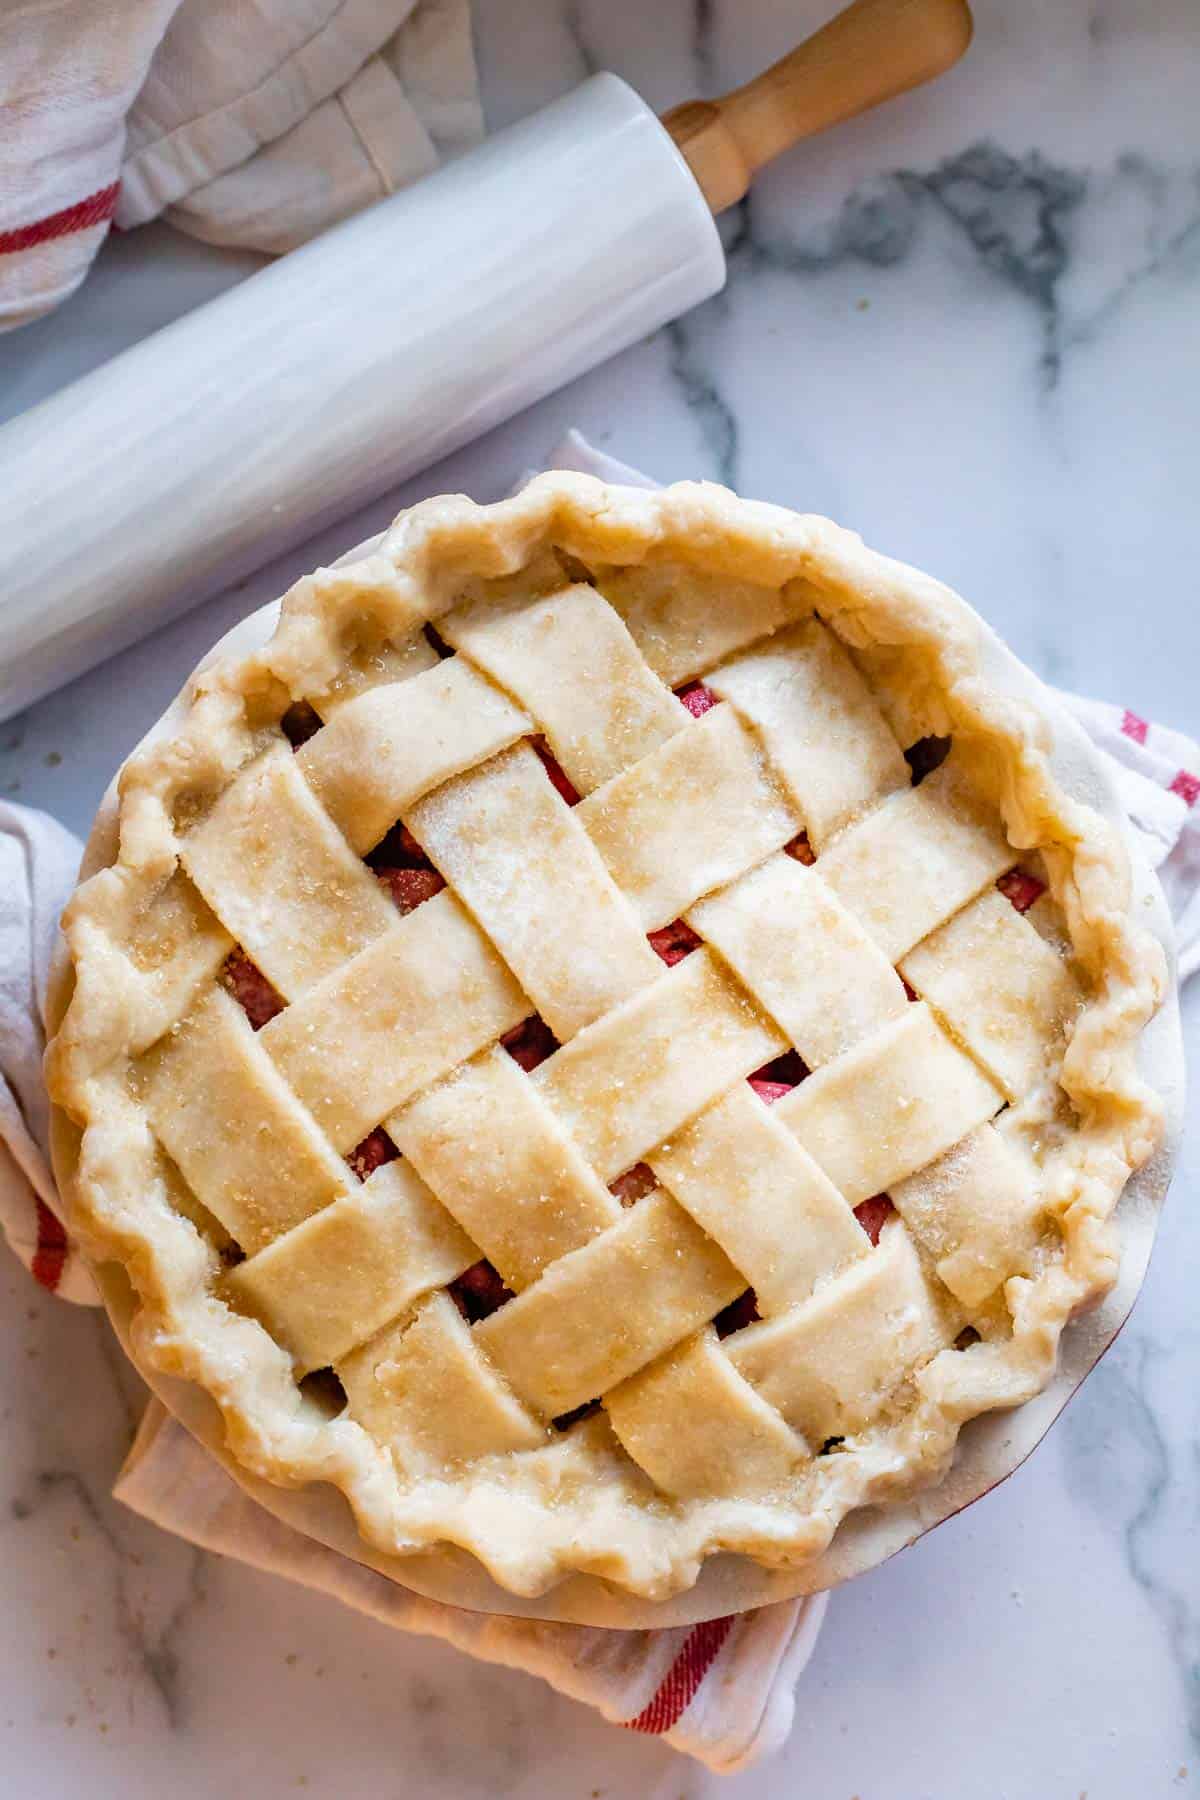
6. Add An Egg Wash And Sugar
Before baking, I brush the lattice with egg wash. This gives a golden, shiny finish. For fruit pies, I like to sprinkle a little sugar on top for crunch and sparkle.
7. Bake As Usual
I bake the pie according to my recipe. If the edges brown too fast, I cover them with foil. The lattice lets me see the filling bubble—this is how I know the pie is ready.
A Visual Guide: Lattice Crust Steps
Here’s a simple table showing the main steps and what to look for:
| Step | What to Check |
|---|---|
| Roll out dough | Even thickness, not sticky |
| Cut strips | Even width, enough strips for weaving |
| Weave lattice | Strips alternate over and under |
| Seal edges | No gaps, dough pressed together |
| Bake | Golden brown, filling bubbling |
Lattice Crust: My Honest Pros And Cons
I’ve made a lot of pies with different tops—crumb, solid, and lattice. Here’s how lattice crust compares.
| Type of Crust | Pros | Cons |
|---|---|---|
| Lattice | Beautiful look, lets steam out, gets crispy | Takes more time, needs practice |
| Solid Top | Easy, simple, keeps filling moist | Can get soggy, less attractive |
| Crumb | Quick, crunchy, sweet | Can burn fast, not for juicy pies |
Common Mistakes And How To Avoid Them
I learned a lot from messing up. Here are things I wish I’d known:
- Warm dough tears – If your dough gets soft, put it in the fridge for 10 minutes. Cold dough is easier to handle.
- Uneven strips bake unevenly – Try to cut all strips the same size.
- Too few strips – If you use too few, the lattice can sag. More strips give better support.
- Not sealing the edges – Press the dough together well, or the filling leaks out.
- Skipping the egg wash – Without it, the crust looks pale and dull.
Credit: sugarspunrun.com
How To Customize Your Lattice Crust
Once you feel comfortable, you can play around:
- Vary the width of strips – Try some thick, some thin for a modern look.
- Twist the strips – For a rope effect, gently twist before weaving.
- Add shapes – Use cookie cutters to add stars or leaves on top.
- Flavor the dough – Add a little cinnamon or lemon zest for extra taste.
Lattice Crust Troubleshooting Table
Here’s a quick guide for fixing common lattice problems:
| Problem | Possible Cause | How to Fix |
|---|---|---|
| Dough tears | Too warm, overworked | Chill dough, use less pressure |
| Strips shrink | Dough not rested | Let dough rest 10 min before using |
| Edges burn | Oven too hot, thin edges | Cover with foil halfway through |
| Filling leaks | Edges not sealed, filling too runny | Seal well, thicken filling |
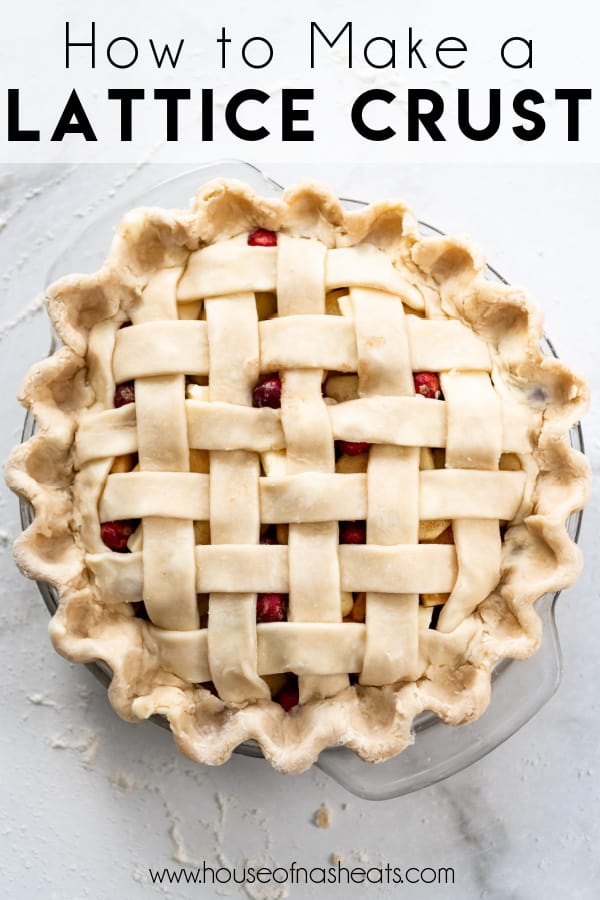
Credit: houseofnasheats.com
Why Lattice Crusts Are Worth The Effort
The first time I made a lattice crust, I was nervous. But when the pie came out golden and beautiful, I felt so proud. People always “ooh” and “aah” when they see a lattice pie on the table. And it’s practical—the steam escapes, and the crust stays crisp.
If you want your pies to look and taste like a bakery treat, a lattice top is worth learning.
A small tip: Don’t aim for perfect on your first try. Even if the strips look uneven, it will still taste amazing. Plus, a rustic look has its own charm.
If you want to see other examples and tips, check out this guide from King Arthur Baking.
Frequently Asked Questions
How Do I Keep My Lattice Crust From Burning?
You can cover the edges with foil or a pie shield once they turn golden. This keeps them from burning while the rest of the pie finishes baking.
Can I Freeze A Pie With A Lattice Crust?
Yes, you can freeze a whole unbaked pie with lattice. Wrap it tightly and bake from frozen, adding extra time.
What If My Strips Keep Breaking?
This usually means the dough is too warm or too dry. Chill the strips for a few minutes and try again.
Should I Brush The Lattice With Egg Wash Or Milk?
Egg wash gives a shiny, golden look. Milk works too but gives a softer finish. I prefer egg wash for a glossy top.
How Wide Should I Cut The Strips?
I like 1/2 to 3/4 inch wide strips for a 9-inch pie. Thinner strips look delicate, but thicker ones are easier to handle.
If you’ve been nervous about making a lattice crust, I hope these tips help you give it a try. It’s one of those skills that gets easier—and more fun—with practice. And the results are always worth it.
Credit: thefoodcharlatan.com