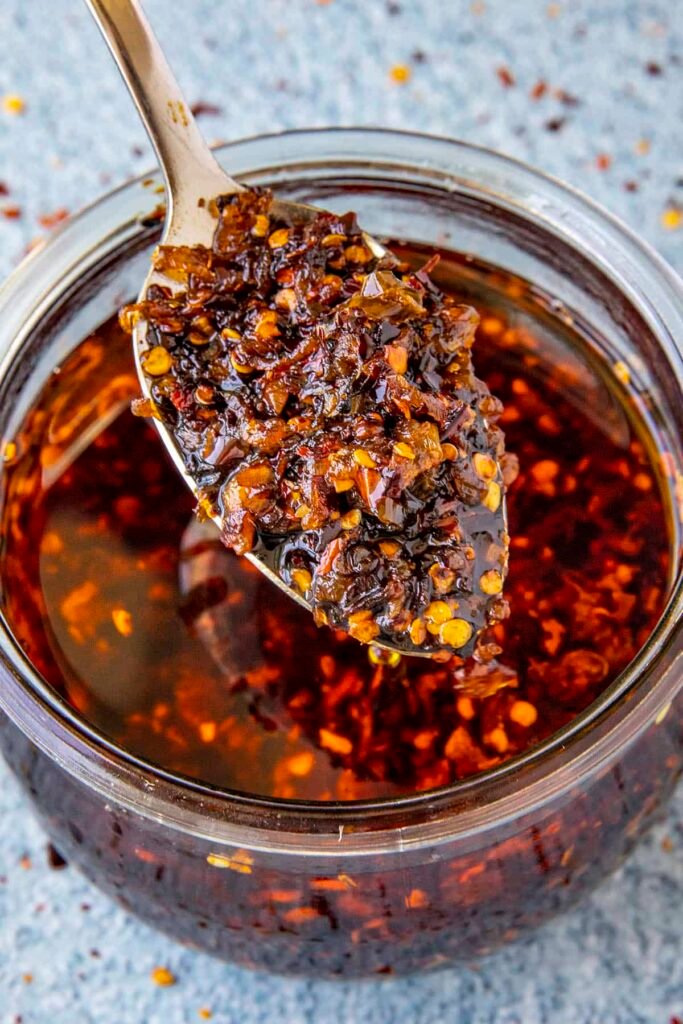

If you’re a fan of Chili oil, then get ready for something even better—Chili Crisp. It’s crunchy, spicy, and full of bold flavor. Think of it as a condiment that adds not just heat, but also texture and aroma. I’ve tested many versions in my kitchen, and this one stands out. It’s inspired by Trader Joe’s Chili Onion Crunch, but I’ve adjusted it with a few tricks I’ve learned over the years to make it even more addictive.
This version mixes fried garlics, shallots, and other aromatic flavors to create that signature crispy bite. I love spooning it over vegetables, tossing it into noodles, or adding it to eggs for breakfast. It’s super versatile, and once you make it, you’ll never want to buy the jarred kind again. One tip I’ve picked up—don’t rush the frying step. That slow crisp gives you the real magic.
What is Chili Crisp?
Chili Crisp is kind of like chili oil, but with an extra crunchy and bold twist. While you can swap them in most dishes, this one stands out for its crispy bits and rich, layered flavor. It’s made by gently cooking chili peppers, garlic, onion, and seasonings in hot oil, creating that deep umami, with spicy, salty, and savory notes in every spoonful.
When I first made this at home, I couldn’t believe how easy it was to get so much flavor from such simple ingredients. Now I always keep a jar nearby.
Some love the crunchy bits, others just want the chili oil—but either way, this is one of the best ways to boost flavor instantly. If you’re a home cook like me, this will quickly become your favorite kitchen essential. I reach for it when my meals need a little heat or texture. Try it once, and you’ll get why so many people swear by it.
Seriously—Chili Crisp turns even plain rice or toast into something exciting.
The Best Chiles for Chili Crisp and How to Prep Them
For the perfect chili crisp, I always reach for a trio of chiles—árbol, japonés, and Kashmiri red. Each one adds its own layer of heat, color, and bold flavor. These dried chiles get even better as they sit in your pantry. Their flavor deepens over time, and that’s one reason I always keep a jar ready to go. If you prefer less heat, swap them out for milder chiles. You’ll still get great taste without the burn.
When prepping dried chiles, I make sure to remove most of the seeds. The seeds are tough and can mess with the texture of your final crisp. I learned this the hard way after my first batch turned out gritty.
Now, for larger chiles, I snip off the tops and shake out the seeds. For smaller ones like árbol and japonés, I use gloves and crush them gently, or trim them over a wire rack set on a baking tray. That way, the seeds fall away cleanly and fast.
After that, I grind the chiles into bits that are just a little bigger than typical chile flakes. This size works best for texture and flavor release in the oil. A spice grinder makes this step simple, and it gives you the perfect base for a bold and complex chili crisp condiment. With this prep, your homemade chili crisp turns out flavorful, crunchy, and easy to use again and again.
Chili Crisp vs. Chili Oil
At its core, chili oil is a basic but bold condiment made by infusing oil with chili peppers. You’ll often find aromatics, spices, and other flavor-boosting ingredients in it. It’s my go-to when I want to add heat quickly to stir-fries or dumplings. But when you want more than just spice, chili crisp brings something extra—it gives you that crunch.
What makes chili crisp stand out is the texture. I love the layers it adds, thanks to crispy shallots, fried garlic, dried onions, peanuts, and sometimes even fermented black beans. I used to grab jars from the store, but after trying a few homemade versions, I realized how much better it is when I make it myself.
You can fine-tune the heat level, the crunch factor, and even the ingredients. It’s flexible, full of flavor, and totally addictive. A spoonful can turn any bowl of rice or noodles into something amazing.
Where to Buy Chili Crisp
If you’re not ready to make chili crisp from scratch yet, don’t stress! I get it—life’s busy, and sometimes you just want something quick. Luckily, there are amazing store-bought options that bring that same bold flavor and satisfying crunch. These are top picks I’ve tried and recommend if you want to experience that spicy, textured kick without the prep.
- Lao Gan Ma Spicy Chili Crisp: This one’s a classic. It’s loved for its rich chili flavor, deep umami, and the perfect amount of crunchy bits. I grew up with this in our pantry—it goes with everything from eggs to dumplings.
- Don Chilio Chili Crisp: What I like most is the variety. You can choose jalapeño, serrano, or even habanero depending on your spice level. It’s a great way to explore different heat profiles without making your own.
- Fly By Jing Sichuan Chili Crisp: A more modern take on traditional Sichuan flavors. It’s not just spicy—it’s packed with aromatics, a hint of sweetness, and deep umami. I use it when I want to impress guests with something bold but well balanced.
- Momofuku Chili Crunch: This one feels more premium and is made to pair with all sorts of dishes. It’s got that same versatility I aim for in homemade chili crisp, but in a neat little jar.
You can find all these on Amazon, so it’s super easy to try one—or all—and discover your favorite. Whether you’re into spicy, mild, or somewhere in between, there’s a chili crisp out there that’ll level up your meals without extra effort.
Chili Crisp Recipe Ingredients
To make a bold and flavorful chili crisp, gather these essential ingredients:
- Neutral Oil: Start with high-quality options like avocado oil, vegetable oil, or canola oil. These oils have a mild flavor that lets the spices and aromatics shine. Avoid strong-flavored oils like olive oil or sesame oil, as they can overpower the dish.
- Crispy Elements: Fry shallots and garlic until golden and fragrant. They create the crunchy texture that sets chili crisp apart. Use extra shallots and garlic if you prefer a chunkier condiment.
- Chili Flakes: Use Sichuan chili flakes for their perfect balance of mild heat and vibrant color. If you prefer more spice, go for arbol or crushed red pepper, or try gochugaru for a unique flavor twist.
- Aromatics: Infuse the oil with star anise, cinnamon, and a bay leaf to add complex, aromatic layers of flavor. These ingredients make the oil deeply satisfying and versatile.
- Sesame Seeds: Add sesame seeds for a nutty crunch and enhanced texture. They also pair wonderfully with the chili’s spice and richness.
- Seasonings: A pinch of salt enhances the flavors, while a touch of sugar balances the heat with a hint of sweetness.
- Custom Add-ins: For variety, add soy nuts, peanuts, preserved black beans, or fresh ingredients like jalapeno, serrano, or red peppers. Adjust these ingredients to your preference to create a spicy and uniquely crispy condiment!
How to Make Chili Crisp Recipe
Creating chili crisp at home is easier than most people think, and it only takes about 25 minutes. This crunchy and aromatic condiment is inspired by Trader Joe’s Chili Onion Crunch, but with even better flavor, texture, and control over ingredients. I’ve been making this version for months after falling in love with the store-bought kind, and I swear—homemade is a game changer. Here’s how I do it:
Step 1: Fry Garlic & Shallots
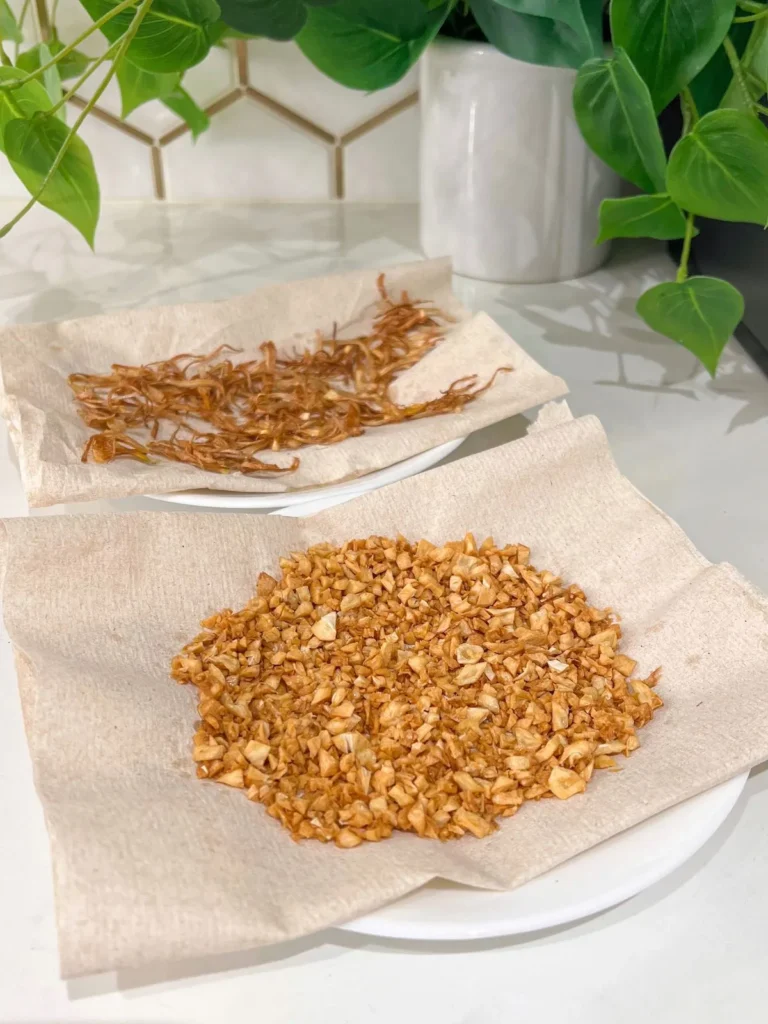
Start by heating a neutral oil in a small pot over low to medium heat. To check the temperature, I usually dip in a chopstick or wooden spoon—if you see bubbles, it’s ready. Fry minced garlic for about 3–5 minutes until it turns golden.
Use a fine mesh strainer to separate the crispy bits and lay them on a paper towel to soak up extra oil. Do the same with thinly sliced shallots. Make sure to strain the oil well—burnt pieces can make it bitter, and nobody wants that.
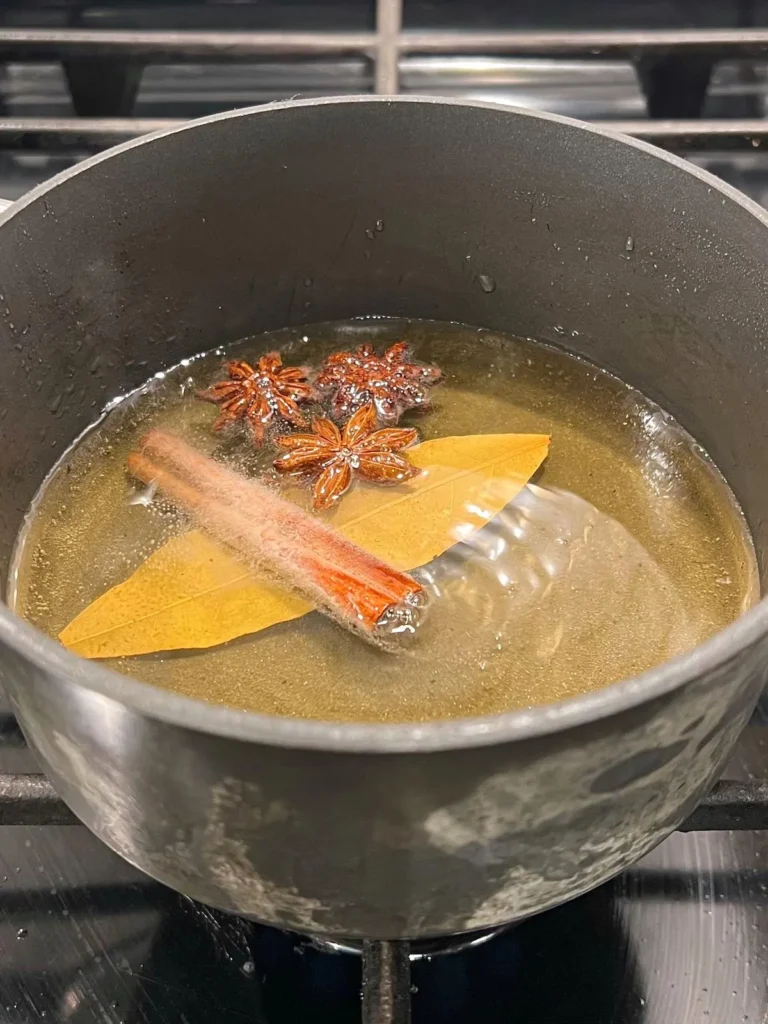
Step 2: Infuse the Oil
Once the oil is clean, toss in star anise, a cinnamon stick, and a bay leaf. Let them gently simmer on low heat for 10 minutes to 1 hour, depending on how intense you want the aroma. This step really builds depth.
I learned that the longer it infuses—without burning—the more complex and warm the final chili crisp tastes.
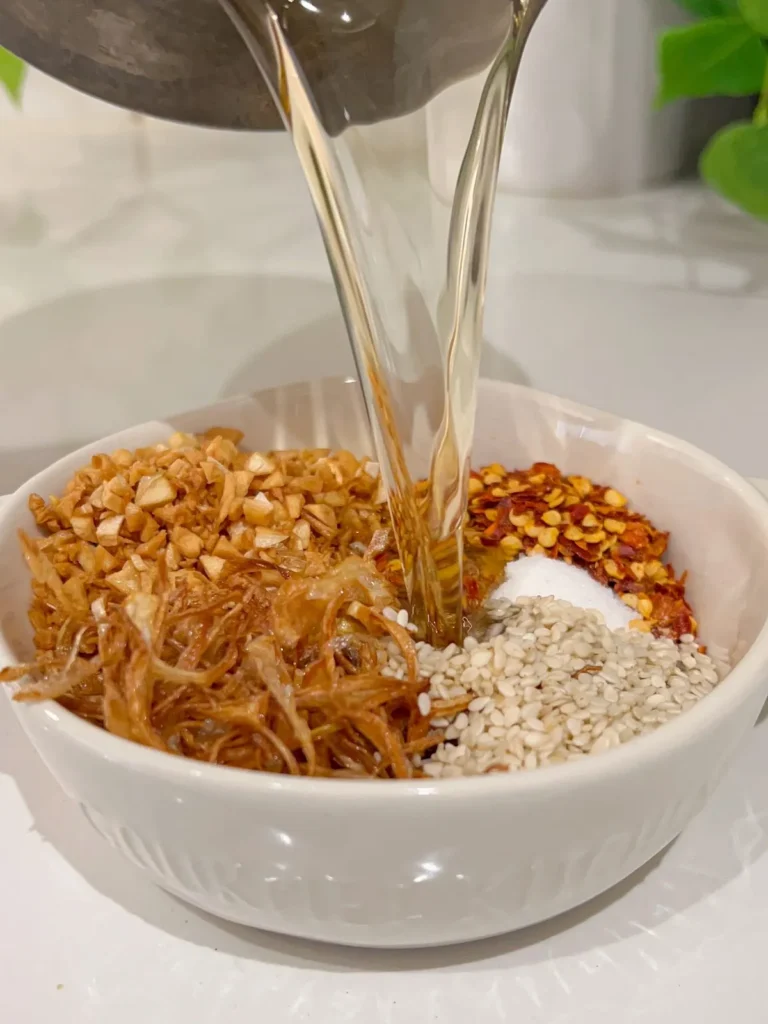
Step 3: Combine Dry Ingredients
Now, mix the dry ingredients in a heat-safe metal or ceramic bowl—never glass! I add chili flakes, the fried garlic and shallots, toasted sesame seeds, a bit of sugar, and some salt. This mix forms the base that gives chili crisp its signature crunch and heat.
Step 4: Pour Hot Oil
Strain out the aromatics from the infused oil, then reheat it slightly. To test again, I use the wooden spoon trick. When it’s ready, pour the hot oil over the chili mixture. That immediate sizzle is exactly what you want—it means everything is cooking just right and releasing max flavor.
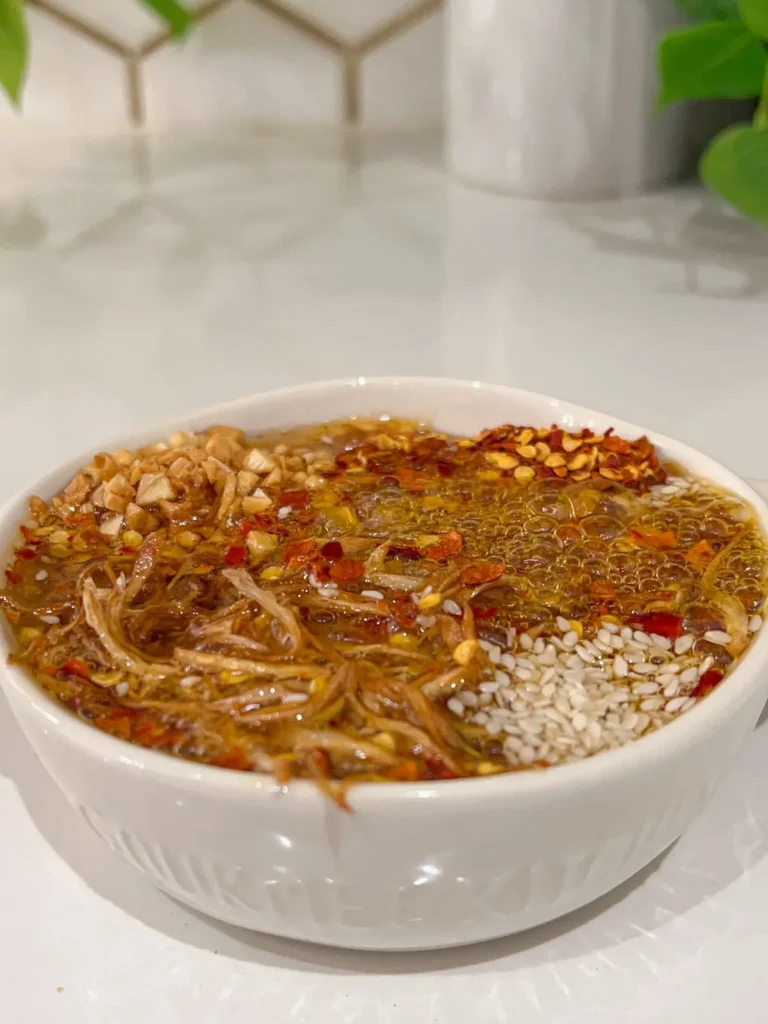
Step 5: Taste & Adjust
Give it a good stir and let it cool. Then taste. If it’s missing something, you can tweak it. Add more salt or sugar, toss in extra chili flakes for more heat, or pour in a bit more oil if it feels too dry. I like mine with more crunch, so I usually go heavier on the garlic and shallots.
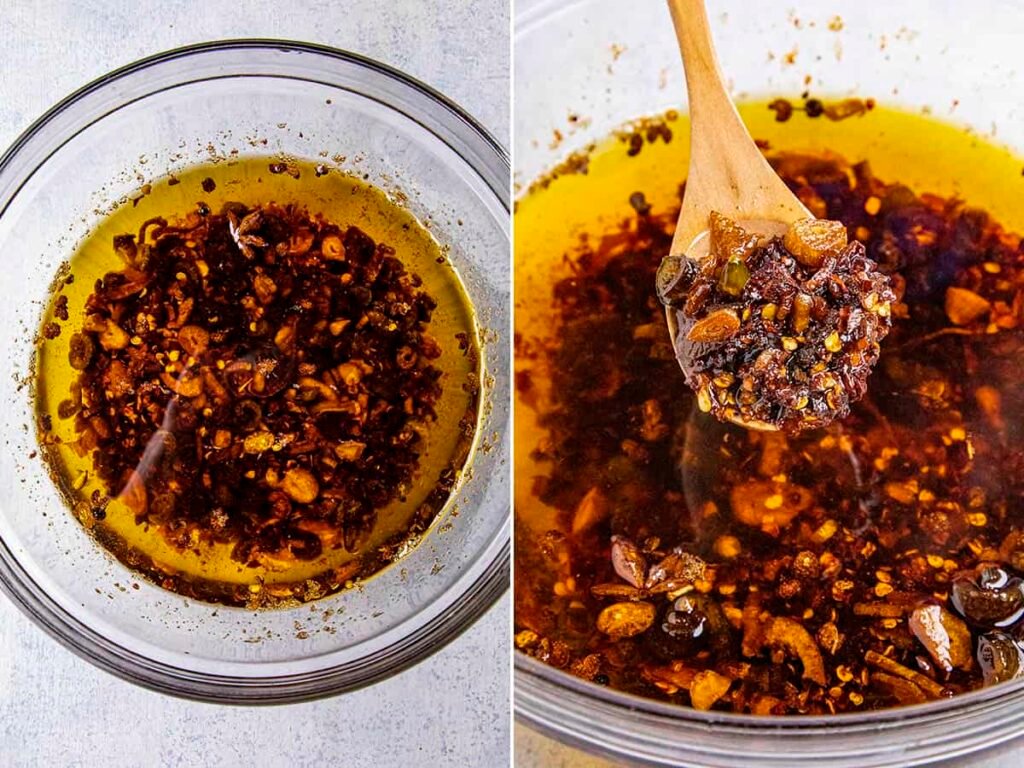
And that’s it. You now have a jar of homemade chili crisp—a spicy, rich, and customizable topping that can turn plain rice, eggs, or noodles into something special. Honestly, once I made it myself, I stopped buying it.
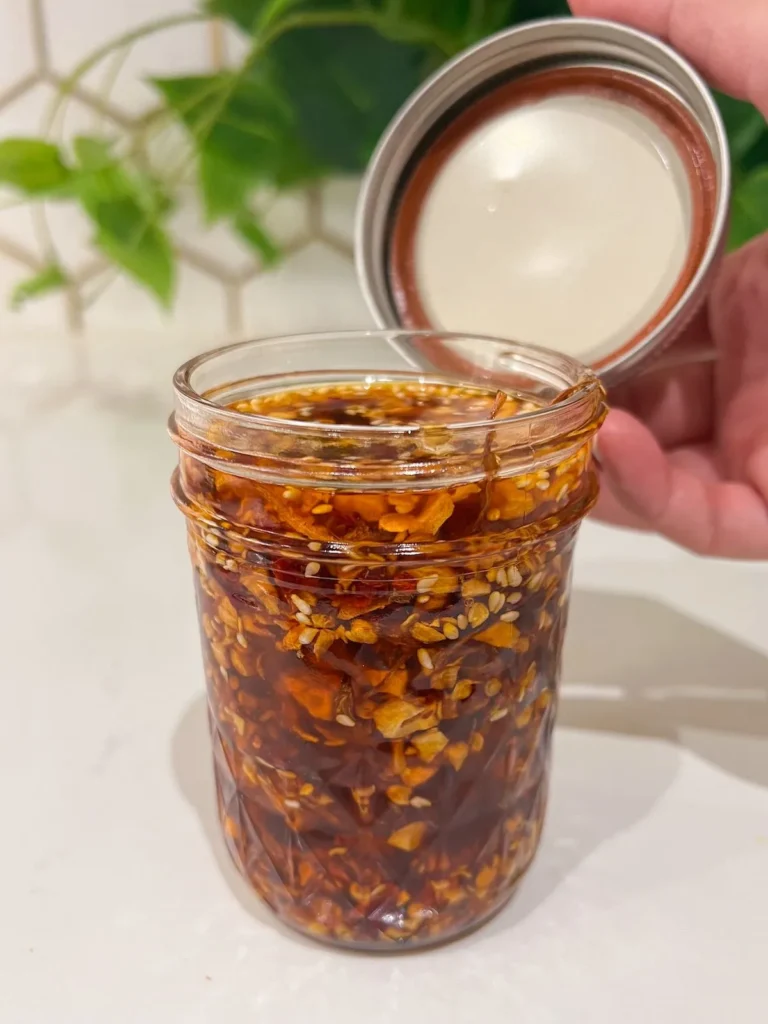
How to Store Chili Crisp
Once your chili crisp has cooled, scoop it into a clean, sterilized jar—I usually use a mason jar with a tight lid. Then pop it in the fridge. It stays fresh for up to 3 months if stored right. Keeping it cold right after use is key. Leaving it out can lead to contamination, and no one wants that.
Before you dig in, always stir it well. The crispy garlic and shallots sink to the bottom. Mixing helps bring the flavor back to life. And don’t forget—use a clean spoon every time. This simple step helps stop bacteria from sneaking in, keeping your chili crisp safe to enjoy longer.
One thing I learned early on: fry your garlic and shallots until they’re fully crisp. If they hold any moisture, it can lead to botulism, which is serious. So don’t rush that step. If you ever notice a weird smell, mold, or taste that’s off, toss it. Safety first. I’ve made this sauce more times than I can count, and following these steps keeps it delicious and safe every time.
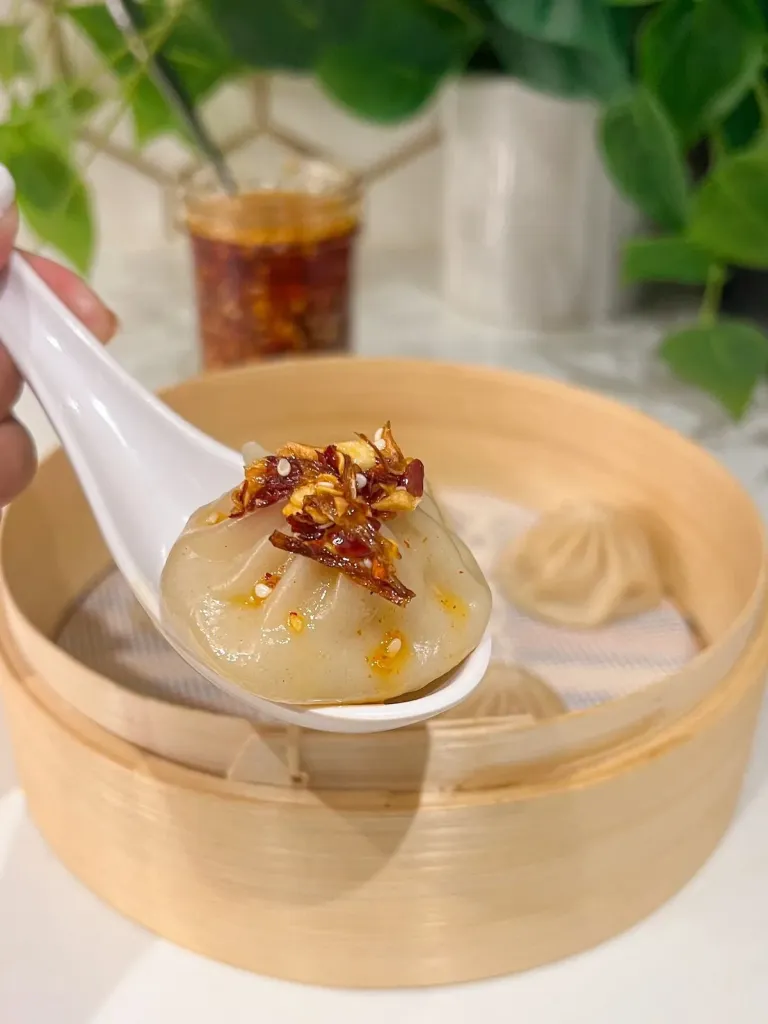
How to Use Chili Crisp
Chili crisp is one of those condiments that makes almost anything better. It’s spicy, crunchy, and full of rich, deep flavor. I keep a jar in the fridge at all times. The first time I tried it, I poured it over rice, and I’ve been hooked ever since.
The combo of fried garlic, crispy shallots, and spiced oil gives it bite and heat. You can use it like you’d use hot sauce, chili oil, or red pepper flakes. Drizzle it on noodles, mix it into sauces, or spoon it over eggs, dumplings, and even pizza. It adds both flavor and texture in one go.
Once you try making it, you’ll see just how many ways it fits into your meals. I even toss it into salad dressings or stir it into ramen broth. It’s super flexible, and honestly, kind of addictive. Trust me—after one bite, you’ll start putting it on everything too.
What Nước chấm is commonly Eaten with
- Yangzhou Fried Rice (Cơm Chiên Dương Châu)
- Vietnamese Fried Rice Cake With Egg (Bánh bột chiên)
- Easy & Simple Tuna Sushi Bake For One
- Salmon Sushi Bake
- Bánh Mì Nachos
- Spicy Crab Sushi Bake Cupcakes
- Tuna Sushi Bake For One,
Chili Crisp Recipe
Description
This Chili Crisp Recipe is simple, crunchy, and full of bold flavor. You can spoon it over rice, noodles, eggs, or even pizza. It adds a mix of heat, crunch, and savory taste to any meal. Once you try it, you’ll want to keep a jar in your fridge all the time!
Ingredients
Instructions
- Pour neutral oil into a small pot. Warm it over medium heat until it shimmers but doesn’t smoke.
- Stir in chopped garlic, shallots, and chili flakes. Let them sizzle slowly until golden and crisp.
- Add soy sauce, sugar, and a pinch of salt. Stir well so everything blends together.
- Let the chili crisp cool fully. Then pour it into a clean jar. Store it in the fridge and enjoy it on noodles, eggs, or rice.
Nutrition Facts
Servings 1
- Amount Per Serving
- Calories 4050kcal
- % Daily Value *
- Total Fat 405g624%
- Saturated Fat 45g225%
- Trans Fat 0.5g
- Sodium 800mg34%
- Potassium 140mg4%
- Total Carbohydrate 25g9%
- Dietary Fiber 8g32%
- Sugars 4.5g
- Protein 7.5g15%
- Vitamin A 800 IU
- Vitamin C 3 mg
- Calcium 50 mg
- Iron 4 mg
- Vitamin E 15 IU
- Vitamin K 18 mcg
- Niacin 3.5 mg
- Folate 15 mcg
- Biotin 2.5 mcg
- Phosphorus 25 mg
- Selenium 2 mcg
* Percent Daily Values are based on a 2,000 calorie diet. Your daily value may be higher or lower depending on your calorie needs.
Note
- High in protein and healthy fats, thanks to beef, cheese, and cream.
- Moderate carbs from pasta sheets, balanced by fiber and protein.
- Rich in flavor-enhancers like fish sauce and marinara without excess sodium (if using low-sodium broth).
