

When I’m in a rush, I pour some over oven avocado toast and eggs. On cozier days, it finishes a bubbling pot of gumbo. When I want to lift my Perfect Dumpling Sauce, a quick drizzle of this homemade chili oil adds deep, molten heat.
What really matters is the detail—the steps, the ingredients, and how you tweak each part to fit your taste. Over time, I’ve answered dozens of questions about making it just right.
My dad gave me the first tip: toast the spices slowly.
My sister once added star anise, and we stared at the pan, unsure if we’d gone too far—but it turned out amazing.
Whether spooned over fried rice, stirred into noodle bowls, or served with bao or dumplings, this chili oil transforms every dish. Try it with a crunchy chili crisp or whisk it into vinaigrettes—you’ll see how flexible and full of flavor it really is.
What is Chili Oil?
Chili oil is simple but very versatile. You make it by soaking vegetable oil with your favorite chili peppers. You can use mild ones or superhot varieties for a fiery kick. This oil is flexible—you can adjust the ingredients to match your taste.
A neutral oil works best because it lets the bold, smoky flavor of the chili shine. Ingredients may vary, but the base stays rich and aromatic. With the right balance, you can make a chili oil that perfectly suits your taste and lifts any dish.
Best Oil for Making Chili Oil
When making the best homemade chili oil, I always start with a neutral oil—something that lets the chili’s natural heat and aroma shine. Oils like peanut oil, canola oil, corn oil, avocado oil, or vegetable oil are ideal. These are all high smoke point oils that won’t interfere with the core flavor profile.
From my own kitchen trials, peanut oil has given me the most consistent results, especially when I want a clean, toasty finish that carries the spice without clouding it.
Now, if you’re tempted by olive oil, sesame oil, or even coconut oil, I get it—I’ve tried them too. But be prepared: these oils have strong, distinct flavors that can compete with the chili and aromatics, sometimes shifting the entire dish. That said, it’s not wrong to experiment. If you love bold, nutty, or tropical notes, you might find your signature blend.
In the end, the right oil depends on how you plan to use your chili oil. Are you drizzling it over noodles, spooning it onto dumplings, or folding it into dressings?
Choose the base oil that best supports the role it’ll play in your dish. I’ve learned that understanding your goal helps you pick smarter—and cook better.
Chili Oil Recipe Ingredients
When making chili oil, you need the right ingredients for a balanced and flavorful result. Here’s a breakdown of what you’ll need and some helpful details:
- Oil: A neutral oil like canola, vegetable, or soybean is ideal as it won’t overpower the flavors. If you want to add a twist, try avocado oil, but be mindful that it can harden in the refrigerator. Light olive oil is also a good option, but it has a lower smoke point and may harden when chilled.
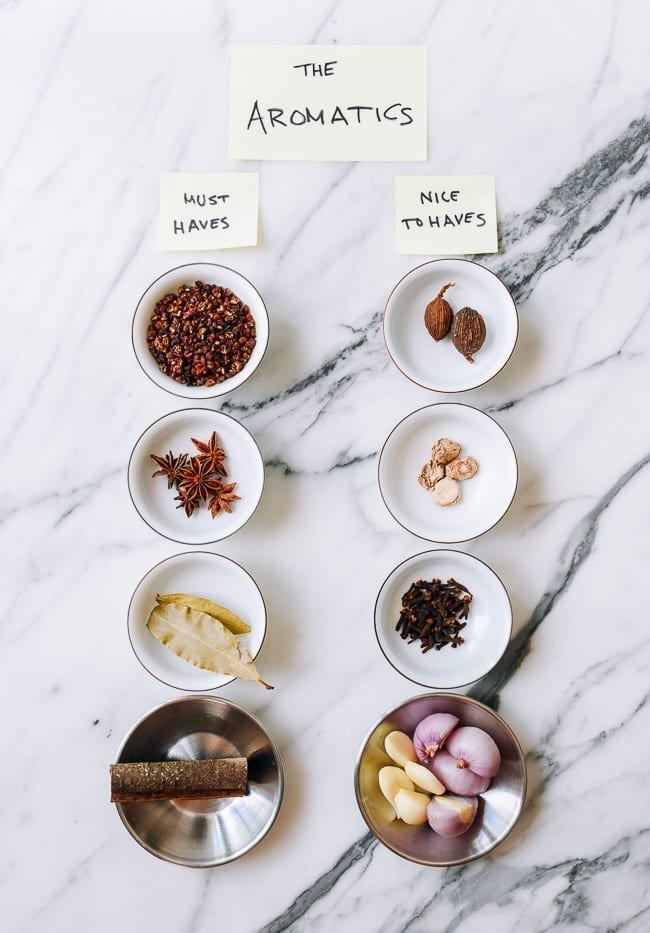
- Essential Spices:
- Star anise
- Cinnamon stick (preferably cassia cinnamon)
- Bay leaves
- Sichuan peppercorns
These spices create the aromatic base of your chili oil
- Sichuan Chili Flakes: For the best flavor and heat, use Sichuan chili flakes rather than regular red pepper flakes. This is key for an authentic taste!
- Optional Add-ins: You can add extra spices and aromatics to elevate the flavor profile:
- Black cardamom (also known as cǎoguǒ)
- Cloves
- Dried sand ginger
- Fresh garlic or shallots for a richer infusion
- Additional Flavor Boosters: To round out the taste, consider adding:
- Soy sauce
- Chinese black vinegar
- Toasted sesame seeds
- Sesame oil
- Salt: Essential to bring out the full depth of flavor from all the spices.
How Much Oil to Use?
- For a lighter chili oil with fewer aromatics, you’ll need about 1½ cups of oil.
- For a richer, bolder flavor with more aromatics, aim for about 3 cups.
Adjust the quantities to your liking, but remember, a little experimentation can lead to the perfect flavored chili oil for your dishes!
How to Make Chili Oil Recipe
Making chili oil at home is easier than most people think. With a bit of patience and a few smart steps, you’ll create a jar full of spicy, aromatic oil that can level up everything from noodles to eggs. After spending years perfecting this process in my own kitchen, I’ve developed a method that’s both simple and deeply flavorful.
Step 1: Prepare Aromatics
Start by laying out your spices: cassia cinnamon, cloves, fennel seed, bay leaves, and black cardamom.
These aren’t just for heat—they build a rich, fragrant base. I often add bai dou kou, plus fresh crushed garlic and sliced shallots—sometimes even scallions if I have them on hand. These aromatics are essential for creating layers of depth.
The first time I skipped fennel seed, I noticed the difference—it really does matter.
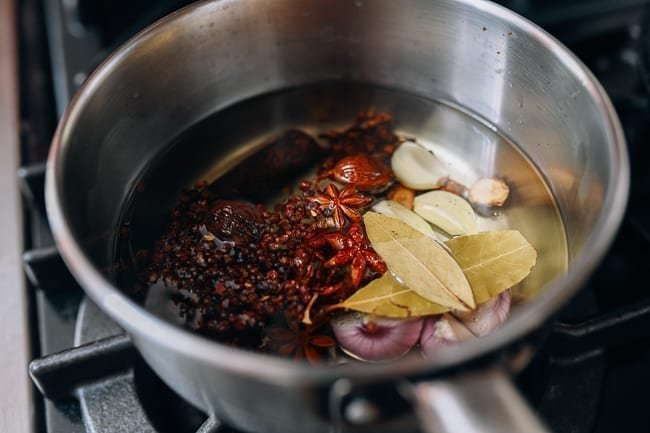
Step 2: Heat the Oil
Combine the aromatics with your neutral oil in a heavy pot. Heat slowly over medium-low.
Use a Thermapen® ONE or an infrared thermometer to stay accurate. You want the oil between 225°F and 250°F—hot enough to draw out the flavors, but not so hot that the garlic burns or the spices turn bitter.
Listen for that soft sizzle and sniff for that toasty, popcorn-like aroma—it’s how I always know I’m on the right track.

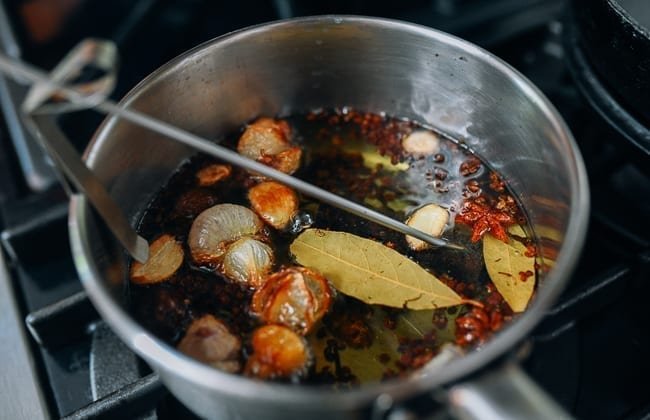
Step 3: Infuse and Strain
Let the oil gently infuse for 30 minutes to an hour. I usually check around the 45-minute mark. Once the shallots and other aromatics start turning golden and have given off their flavor, take them out.
Strain the oil through a fine-mesh sieve. Keeping it smooth and clean helps the chili oil last longer and blend beautifully into dressings or dips.
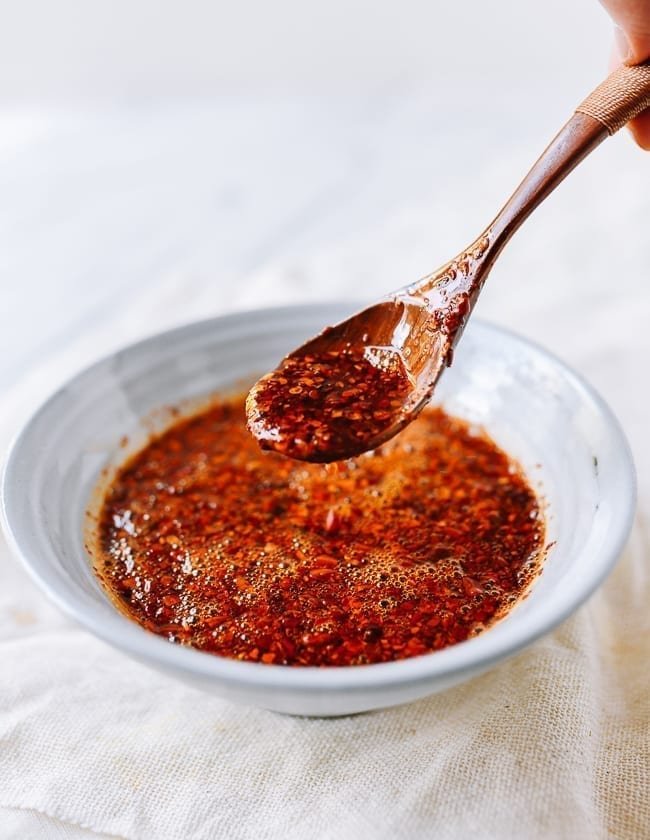
Step 4: Combine with Chili Flakes
Place your chili flakes in a heatproof bowl—you can pick a bright red or a deep red depending on your flavor preference.
Carefully pour the hot oil over the flakes while stirring. It should sizzle—this part always reminds me of my sister leaning over the bowl, wide-eyed, the first time she helped me.
Finish with a pinch of salt, and if you want to level it up, add some lightly toasted sesame seeds, or a splash of soy sauce and black vinegar for a more complex flavor profile.
Advice on Making Chili Oil
Mastering chili oil isn’t just about mixing ingredients—it’s about balancing heat, aroma, and technique. Whether you’re inspired by creators like Mikey Chen or crafting your own spicy blend, these real-world tips come from experience—and they’ll help you get it right the first time.
Techniques and Tips
Start with a heavy-bottomed wok or saucepan. It helps the oil heat evenly, which matters more than you might think. Always use low to medium heat—too hot, and you’ll burn your spices, leaving a bitter taste. I’ve made that mistake once during a rushed dinner party prep and regretted it instantly.
Add pre-toasted spices like Sichuan peppercorns to build a layered, fragrant base. When you stir in your chili oil crisp flakes, make sure the oil is hot enough for them to bloom, but not smoke. Keep your eye on the timing—don’t go past 30 minutes, and try to keep a steady heat throughout.
When it comes to choosing peppers, think about flavor and spice level. I often use a mix—Thai chilis, Ghost Peppers, or Jalapeños for serious heat, and xiao mi la to round out the flavor. You can grind them coarsely or fine—it depends on the texture you’re aiming for. I always divide my oil into small batches to avoid overheating and to keep control over each step.
Storage and Safety
Once your chili oil is ready, let it cool completely. Then pour it into airtight, heat proof containers. If I’m making a big batch, I label and refrigerate a few jars to keep the flavor fresh longer. Sterilizing your tools—especially jars and utensils—is a simple step, but it prevents spoilage and ensures your oil lasts for weeks. Stored properly, your homemade oil can easily match or beat anything from the store—both in taste and shelf life.
Whether you’re trading tips in forums like r/ChineseCooking or following leads from trusted voices on platforms like Linity, these steps will help you create chili oil that’s balanced, bold, and deeply flavorful every time.
What Chili Oil is Commonly Eaten with
- Yangzhou Fried Rice (Cơm Chiên Dương Châu)
- Vietnamese Fried Rice Cake With Egg (Bánh bột chiên)
- Easy & Simple Tuna Sushi Bake For One
- Salmon Sushi Bake
- Hot and Sour Soup Like a Chinese Chef
Homemade Chili Oil in 20 Minutes: Bold Flavor, Real Heat, Zero Additives!
Description
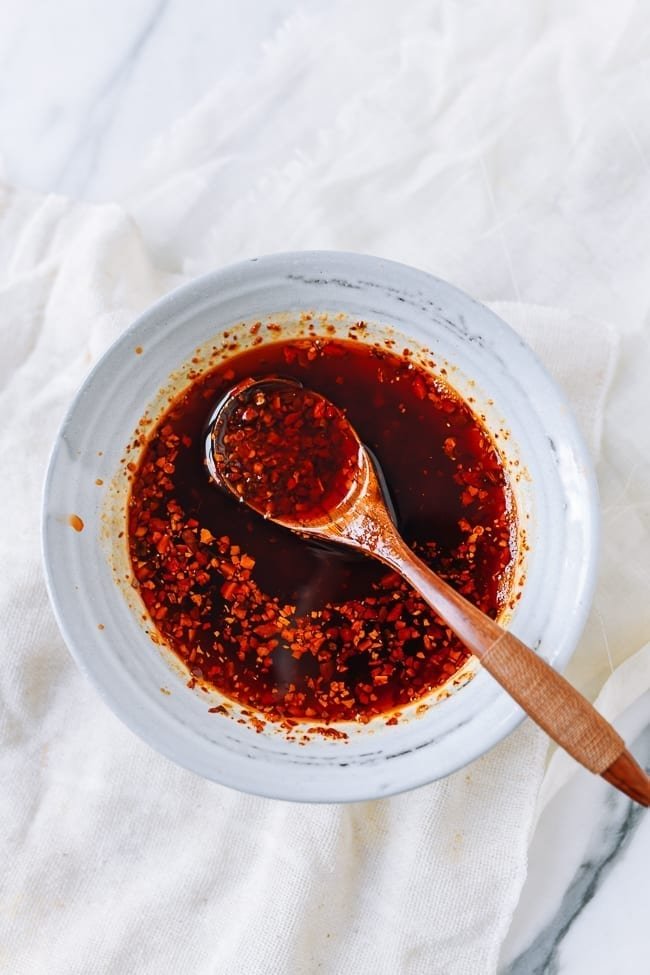
Making chili oil at home is more than a recipe—it lifts every dish you cook. This bold, aromatic sauce mixes toasted spices, crispy chili flakes, and fragrant infused oil to give a rich, layered heat you can adjust. I love using it on noodles, dumplings, or stir-fries, and it works great in soups or as a dipping sauce. Every spoonful adds deep flavor and just the right kick, making simple meals taste like they came from a restaurant.
Ingredients
Instructions
- Prepare the ingredients – Gather dried chili flakes, neutral oil (like vegetable or canola), garlic, ginger, and a pinch of salt.
- Heat the oil – In a small pan, slowly heat the oil over medium-low heat until warm, not smoking.
- Add aromatics – Carefully add sliced garlic and ginger to the warm oil. Let them sizzle gently until fragrant and lightly golden.
- Mix in chili flakes – Remove the pan from heat and stir in the dried chili flakes. The residual heat will release the spicy aroma without burning them.
- Cool and store – Let the mixture cool slightly, then pour it into a clean jar. Add a pinch of salt to enhance flavor.
- Optional infusion – For deeper flavor, allow the chili oil to sit for a few hours or overnight. Shake the jar before using.
Nutrition Facts
Servings 3
Serving Size 35 tbsp
- Amount Per Serving
- Calories 4200kcal
- % Daily Value *
- Total Fat 472.5g727%
- Saturated Fat 52.5g263%
- Sodium 3500mg146%
- Total Carbohydrate 17.5g6%
- Dietary Fiber 3.5g15%
- Protein 1g2%
- Vitamin A 5 IU
- Vitamin C 5 mg
- Calcium 40 mg
- Iron 6 mg
- Zinc 1 mg
- Selenium 2 mcg
- Copper 2 mg
- Manganese 6 mg
* Percent Daily Values are based on a 2,000 calorie diet. Your daily value may be higher or lower depending on your calorie needs.
Note
- Use as a chili oil drizzle for eggs, rice, or avocado toast.
- Makes a perfect chili oil condiment for any dish.
- Acts as a powerful spicy infused oil for layering heat.
- Elevate flavor with an aromatics oil infusion of bay leaf, star anise, and scallions.
- Great as chili oil for noodles or chili oil for dumplings.
- Ideal for a flavorful vegan chili oil option.
- Learn exactly how to make chili oil from scratch.
- Follow this easy chili oil recipe to avoid overwhelm.
