
This helps your starter grow strong. You will soon learn to discard some of it, help it grow, and enjoy a fresh loaf every week. Stick to a regular routine and know the process. It will make your beginner sourdough experience easy and fun.
When I first started, I tested different bread, from homemade bread to store-bought bread. I tried filler-free and preservatives-free methods. This keeps the bread gut-friendly and helps with better digestion. My goal was simple. I wanted to bake a comfort loaf with good ingredients. I controlled every step of the process — the same care I use when making desserts like Vegan Mango Sago (Dairy Free) or sweet treats like Easy Berry Coconut Poke Cake Recipe for my family.
Over time, learning became a fun hobby. My kitchen slowly turned into a small bakery. Using the starter correctly, keeping it fresh, and knowing when to bake makes a big difference. From my experience, once you get the flow, every home-baked bread feels like a win.
Some days, I pair my sourdough with Ube Pancakes with Ube Coconut Sauce for a bright morning, or a slice of Reduced-Sugar Banana Bread Muffins for a light snack. On lazy weekends, I love to make an Easy French Toast Recipe using my leftover sourdough — it turns out golden and crisp every time.
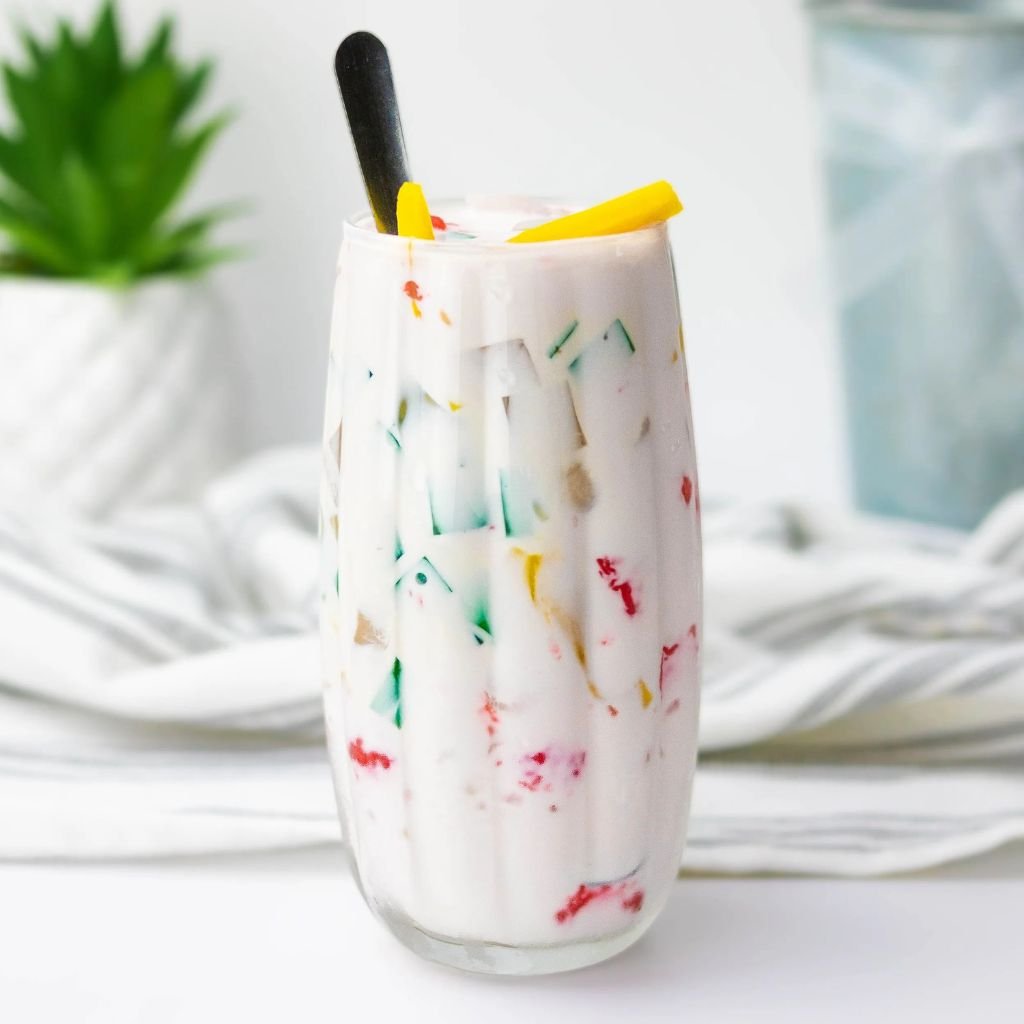
I like to eat my sourdough bread with Teriyaki Salad Dressing for a tangy snack. Sometimes, I eat it with soft Ramen Eggs for breakfast. I also enjoy a slice with Vietnamese Fruit Dessert or sweet bites like Tanghulu Recipe (Chinese Candied Fruit). It makes a tasty balance of flavors. These small touches make the sourdough journey more fun. I even spread Golden Milk Paste on warm sourdough toast for a cozy drink and snack combo.
They keep the focus on homemade, fresh loaf, and the joy of bread-making. Sharing these tips with you is why I love this craft. I hope it inspires your own sourdough journey.
What is the sourdough starter?
A sourdough starter is a simple mix of flour and water. It catches wild yeast and beneficial bacteria from the air and your kitchen environment. This living mixture works as a leavening agent that makes sourdough bread rise.
You don’t need chemical leaveners like baking powder or commercial yeast. After several days, the starter will grow and turn ripe, strong, and bubbly. Feed it with fresh flour and fresh water each day to keep it nice, well maintained, and perfect for baking.
In my kitchen, I’ve used the same starter for over a year, and it’s always worth the wait when I bake. The process of creating and maintaining a starter builds patience and trust in the science of breadmaking.
Some restaurants keep their starters for generations, passed down with love and care. A current starter can stay strong for a long time, even six months or more, if it’s cared for and maintained. Everyone who has had homemade sourdough knows—it’s so far the most natural and rewarding method of baking.
Why You Will Love Sourdough
You’ll love sourdough for many simple reasons, even if it feels a bit new at first. It takes some effort, but making bread by handcrafting it brings pure joy. In every kitchen, a small colony of beneficial bacteria and yeasts helps your starter grow and stay full of life. These tiny helpers turn a basic mixture into food that’s rich in flavor and good for your health. It may sound a little crazy, but folks like me keep doing it because it feels calm, real, and deeply rewarding.
My own baking experience, I’ve learned that trust and patience matter most. Long before yeast was packed and sold in stores, families passed down starters through generations as a valuable treasure. That same love and care still live today. Keeping your starter alive and maintaining it with care makes it strong and ready for years.
The art of nurturing your own starter isn’t only about baking—it’s about caring for something living, sharing that love, and feeling proud of what you make. Once you feel that bond, sourdough becomes more than bread—it’s a joyful part of life built on warmth, health, and heart.
Health Benefits
Sourdough is great for your body in many easy ways. It goes through fermentation, which makes it much easier to digest. Grains, beans, and nuts have something called phytic acid. This acid can block your body from using key nutrients. But when you soak or ferment food, that problem goes away. People in traditional cultures knew this secret. They used a fermented starter and natural leavening instead of instant yeast. This made bread rise well, stay fresh longer, and support good health.
During fermentation, the yeasts and friendly bacteria in your sourdough starter remove most of the harmful parts. They also help your body take in nutrients better and improve digestion.
From my own baking journey, I’ve learned that making your own starter lets you catch native yeasts from your home air. It feels like a lost art, but it’s a very rewarding one. These wild yeasts work with old methods to turn simple foods and seeds into something your body can handle with ease.
Eating fermented bread feels lighter and more natural than store-bought loaves. These days, most people have lost that habit. Still, there’s one clear reason why sourdough feels so good—it helps your body work the way it was meant to, in the most natural and wholesome way.
Ingredients
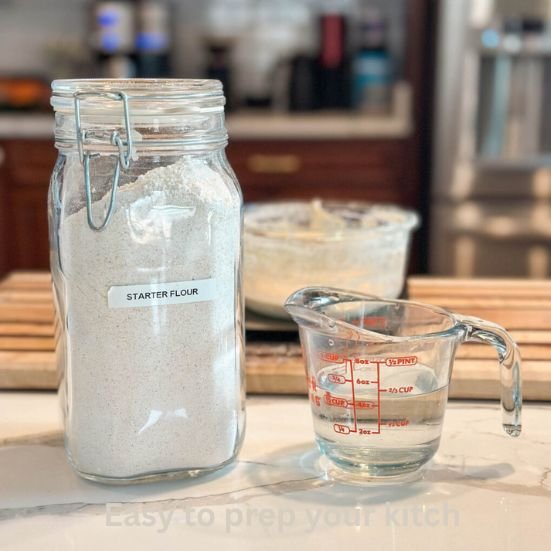
- All-purpose flour / organic flours – Feeds the starter and helps it grow strong. It supports natural yeasts.
- Filtered water / bottled water / tap water – Mixes with the flour. Let chlorine dissipate so the fermentation process works well.
- Jar (Weck Jar recommended) – Keeps your starter safe. You can watch it grow.
- Long handled wooden spoon / spatula – Mixes the flour and water evenly. Prevents contamination.
- Cleaning the sides (optional) – Keeps the jar clean. Helps avoid mold.
- Patience and time – Starter needs to sit overnight and be fed often for best results.
- Unbleached flour – Makes the sourdough starter healthy and strong. Gives good flavor.
Equipment Checklist for Your Sourdough Starter:
- Kitchen Scale – Weigh flour and water so your starter is just right.
- Glass Jar / Le Parfait Jars – A clear jar lets you watch your starter rise. Use about 20 ounces / 740 liters for beginners.
- Lid – Keeps dust out while letting your starter breathe.
- Rubber Band / Mark Jar – Mark the starter level to keep track of growth each day.
- Wooden Spoon / Silicone Spoon – Mix your starter safely without scratching the jar.
- Save Discard – Leftover starter can go in pancakes, waffles, or crackers instead of being wasted.
- Handy Tips – Keep all tools nearby. Feeding and checking your starter becomes easy and fun.
This list helps your readers use their equipment quickly and correctly for making a strong, healthy sourdough starter.
Here’s everything you need to know about making your own Sourdough Starter from scratch.
When I first began baking sourdough, I was amazed that simple things like flour, water, and yeast could come alive. The process is slow but so rewarding. It’s a mix of science, trust, and care. The beneficial bacteria and wild yeast act as a leavening agent. They help your dough grow, ripen, and build that rich, complex flavor we love in sourdough.
Over time, this small jar of life becomes strong, active, and easy to maintain with daily feeding. It’s more than bread — it’s a living tradition passed down through generations, cared for by restaurants and home bakers alike.
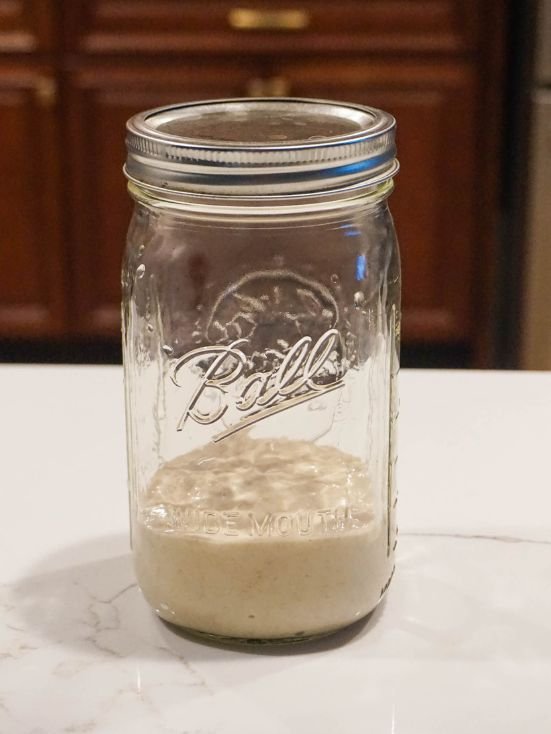
I use a quart-sized mason jar or a glass bowl. A ceramic bowl or plastic bowl works too. Mix unbleached flour — I like King Arthur’s organic all-purpose flour or whole wheat flour from a local farm — with room temperature water. Use about 75 grams of flour and 100 grams of water. Stir with a spatula or spoon.
Cover with cheesecloth or a kitchen towel, tied with a rubber band. Let it rest in a warm spot. That’s when the natural fermentation begins. The bacteria and yeast from the air and flour start to grow, creating your starter from scratch.
Step 1: Choose your container
Pick a clean quart-sized mason jar or glass bowl. Make sure it’s big enough for your starter to grow and bubble. I’ve also used a ceramic bowl and plastic bowl, and they work well. Keep it in a spot with steady temperature and airflow. Cover it, but not too tight — your starter needs to breathe.
Step 2: Mix your ingredients
Combine 75 grams of unbleached flour (or whole wheat flour) with 100 grams of room temperature water. Mix with a spatula into a thick paste. The method is simple, but it’s pure science. The wild yeast and beneficial bacteria wake up and begin to feed.
Step 3: Cover and rest
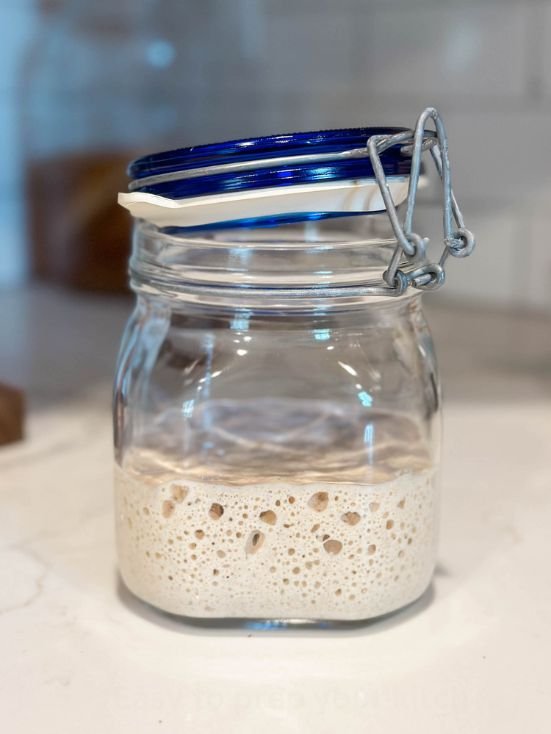
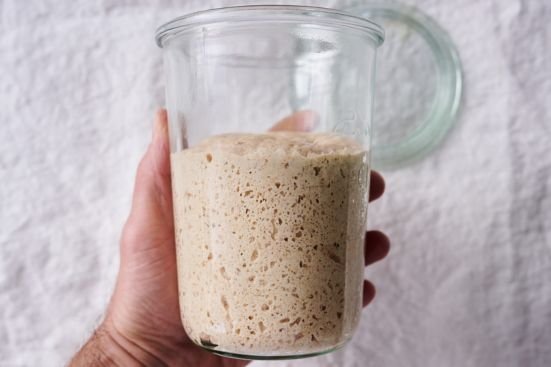
Cover the top with cheesecloth or a kitchen towel, held by a rubber band. This lets air in but keeps dust out. Leave it for 24 hours. The next day, you might see small bubbles — the first sign of yeast development and a living, active mix.
Step 4: Feed daily and discard
Each day, discard half your starter (about 100g). Then feed the rest with 25 grams of flour and the same of water. Stir well, then cover again. This keeps your starter manageable, ripe, and balanced with friendly bacteria. In a few days, your current starter should smell clean and a bit sour — not dank or off.
Step 5: Observe and adjust
Your starter should look bubbly, stringy, and fine as it matures. If it’s too loose, add a little more flour. If it’s too tight, add more water. Let it rest if your kitchen is cool, or feed more often if it’s warm. You’ll learn its rhythm each day — that’s part of the experience and trust.
Step 6: Ready to bake
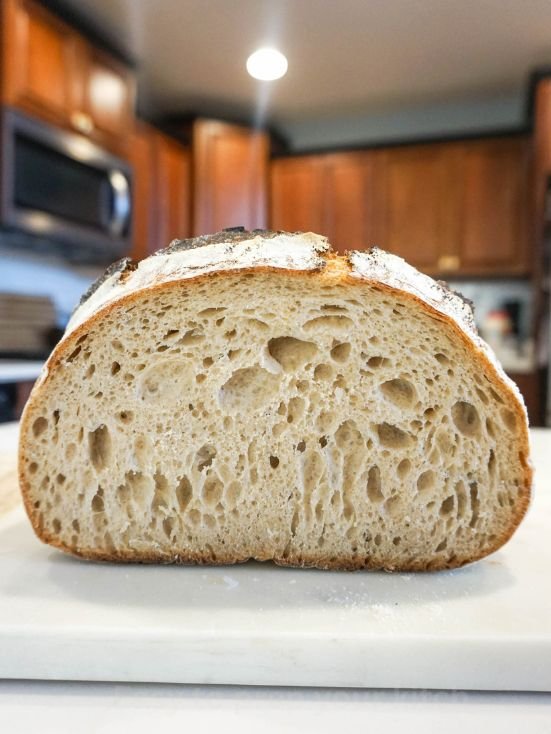
After a week, your starter should double in size within hours of feeding. That means it’s ready to bake bread, bagels, or English muffins. Keep it feed weekly if you store it in the fridge, or daily if it stays out. I’ve maintained mine for over six months, even a year, and it’s still perfect. Once, it had a strange smell, but steady feeding brought it back — a real revive moment in my baking life.
More Recipes You Might Like

Easy Sourdough Starter Recipe for Beginners
Description
Making your Sourdough Starter is easy and fun. I will guide you step by step. You only need simple ingredients and patience. By the end, you will have a bubbly, active starter ready for baking.
Ingredients
Instructions
- Take equal parts flour and water and mix them into your starter. Stir well. This keeps the yeast active and ready for baking.
- Let your starter sit in a warm spot. Cover it loosely. This helps it bubble and grow.
- After 24 hours, your starter should look bubbly and smell slightly tangy. This means it’s active and ready to use.
- Use your starter in a recipe or store it in the fridge. Feed it once a week if storing. Always stir before using.
Nutrition Facts
Servings 1
Serving Size 200
- Amount Per Serving
- Calories 364kcal
- % Daily Value *
- Total Fat 1g2%
- Saturated Fat 0.2g1%
- Sodium 2mg1%
- Potassium 107mg4%
- Total Carbohydrate 76g26%
- Dietary Fiber 3g12%
- Protein 10g20%
- Calcium 15 mg
- Iron 3.6 mg
- Niacin 3.6 mg
- Folate 120 mcg
- Biotin 9 mcg
- Selenium 236 mcg
- Molybdenum 7 mcg
- Chloride 2 mg
* Percent Daily Values are based on a 2,000 calorie diet. Your daily value may be higher or lower depending on your calorie needs.
Note
- Use fresh ingredients. Fresh flour and clean water give your starter the best chance to grow.
- Keep it warm. A cozy spot helps the natural yeast and bacteria become active faster.
- Stir daily. Mixing your starter once or twice a day keeps it healthy and bubbly.
- Be patient. It can take 5–7 days to see strong bubbles. This is normal—don’t rush it.

An impressive share, I just given this onto a colleague who was doing a little analysis on this. And he in fact bought me breakfast because I found it for him.. smile. So let me reword that: Thnx for the treat! But yeah Thnkx for spending the time to discuss this, I feel strongly about it and love reading more on this topic. If possible, as you become expertise, would you mind updating your blog with more details? It is highly helpful for me. Big thumb up for this blog post!