The secret ingredient is sweetened condensed milk, which gives it a rich, smooth flavor. It adds sweetness, just like in a cà phê sữa đá affogato. This yogurt can be as runny or as firm as you want, depending on how much agar agar you use. I love using agar agar because it’s a vegan substitute for gelatin and gives the yogurt the perfect texture. Making sữa chua at home is a great experience.
It’s easy and cost-effective. You can make a large batch for your family and friends. Store-bought yogurt just doesn’t compare. You can use whole milk, reduced-fat milk, or even water. The yogurt will always have a smooth and chewy texture, making it perfect for dessert or a snack. When I was a kid, I used to buy frozen sữa chua from street vendors.
It came in little plastic baggies. You would bite off a corner and enjoy this sweet frozen treat, almost like ice cream! It’s such a fun memory. The balance of tanginess and sweetness makes this yogurt a favorite. You can also enjoy it with dishes like Vietnamese Winter Melon Soup or Bánh bột chiên.
Vietnamese yogurt is called Sữa Chua or Da Ua. The word "sữa" means "milk," and "chua" means "sour." So, sữa chua means "sour milk." It is also called Da Ua, a translation of the French word Yaourt.
Sữa chua has a smooth, silky texture. It’s soft, like a custard. The flavor is a mix of sweet and tangy. This yogurt is made with sweetened condensed milk, which gives it its unique taste. This sweetness makes Vietnamese yogurt different from others, which are more tart.
In the past, Vietnamese yogurt was made in a clay pot. The temperature had to be just right. Today, it’s easier to make it with an Instant Pot.
American vs. Vietnamese Yogurt
Vietnamese yogurt is not the same as American yogurt. The big difference is the milk. Vietnamese yogurt uses condensed milk, while American yogurt uses fresh milk. This makes the Vietnamese version sweeter and creamier. The sweet taste balances the tangy flavor.
I first tried it in Vietnam, even on a plane! I like the non-frozen kind best. It’s easy to make and keep in the fridge. You can enjoy it all week long.
Like other yogurts, it has live active cultures. These tiny helpers turn milk into lactic acid, which gives the yogurt its tangy taste.
I love making sữa chua at home. It’s sweet, fresh, and has a little tang. It’s a quick treat I can enjoy anytime.
Personal Insight: I’ve tried both styles, and I prefer the Vietnamese one. It’s light, sweet, and great alone or with sticky rice and tropical fruit..
The yogurt maker I use was a great find at a thrift store, thanks to my mom (she even has a few extras!). If you don’t have one yet, there are many good yogurt makers available. They all do the same thing: they keep the right temperature for a set amount of time, letting the active cultures work. I’ve also made yogurt in my Instant Pot before, and even in my oven.
But I think yogurt makers are the most convenient. They come with the perfect-sized jars for snacks. Some even have a timer for easy cooking. They are also small, so they fit easily in any kitchen. Making homemade yogurt has become so simple and fun for me, especially with a good yogurt maker.
Tip: I once repurposed baby food jars for my Sữa Chua batches. They were the perfect size and added a charming touch to my kitchen.
Ingredients For Sữa Chua
When making sữa chua, it’s important to use the right ingredients to get that perfect balance of creamy sweetness and tangy flavor. I’ve made Vietnamese yogurt many times, and here's what I use to get the best results:
Sweetened condensed milk – Sữa đặc có đường: This is the secret ingredient that gives sữa chua its rich sweetness. For a true Vietnamese touch, I always go with Longevity Brand, also known as Sữa Ông Thọ, as it’s the brand most people in Vietnam trust. When I was living there, I noticed how common it was to find this brand everywhere, from local stores to street vendors!
Milk – Sữa tươi: For a creamy texture, I recommend using whole milk. It gives the yogurt that rich, smooth taste. However, if you’re looking to cut back on fat, reduced-fat milk will also work. The perfect ratio I use is 1:3 of condensed milk to regular milk for the best consistency. This simple combination makes the yogurt smooth and creamy, without being too heavy.
Water: If you want to reduce dairy intake or save some money, you can use water instead of milk. If you go this route, make sure to adjust the ratio to 1:2.5 to prevent the yogurt from becoming too runny. I’ve tried making it both ways, and when I used water, the yogurt was lighter and still delicious.
Yogurt – Sữa chua: This is the most important ingredient for getting the fermentation process right. You’ll need pre-made yogurt with active bacteria cultures. I always opt for unflavored, unsweetened yogurt to keep things simple and let the sweetness of the condensed milk shine. Be sure to check the packaging for active cultures; I’ve learned the hard way that not all yogurts have them! I love using whole milk yogurt because it keeps the flavor rich and smooth.
With these ingredients, you’ll be able to make sữa chua at home just like the ones I’ve enjoyed in Vietnam. It’s a fun, rewarding process that’s easy to get right once you have the right balance of ingredients.
How to Make Vietnamese-style yogurt
Making Sữa chua • Vietnamese-style yogurt is a fun and easy process that gives you creamy, delicious yogurt at home. Here's a simple guide to help you make perfect yogurt every time.
Step 1: Prepare the jars
First, place your jars and lids into a large, heat-proof bowl. Pour boiling water over the jars to cover them completely. Let the jars sit for about 5 minutes. This sterilizes them. Once done, carefully remove the jars and turn them upside down to air dry on a cooling rack. This step is important to make sure the jars are clean and dry, which will help the yogurt set perfectly. I learned this trick the hard way—once, I skipped it, and the yogurt didn’t turn out right.
Step 2: Room-temperature yogurt
Take the yogurt you plan to use and place it on the counter. Let it sit for a while until it reaches room temperature. This will help it mix better with the warm milk in the next step.
Step 3: Combine the milks
In a pot or sauce pan, pour in your condensed milk and whole milk. Heat it over medium-low heat, whisking gently and stirring constantly. Keep stirring until the condensed milk fully dissolves into the milk. The mixture should be smooth and even at this point.
Step 4: Check the temperature
Once the mixture reaches 40-45°C or 105-113°F, take it off the heat. This is the right temperature for adding your yogurt starter. Stir the mixture gently in one direction. If there are a few small lumps, don’t worry—that’s perfectly normal.
Step 5: Strain the mixture
Next, carefully strain the yogurt mixture into a clean bowl to remove any lumps. Then, ladle the mixture into your prepared jars or strain directly into the jars.
Step 6: Use the electric cooker or oven
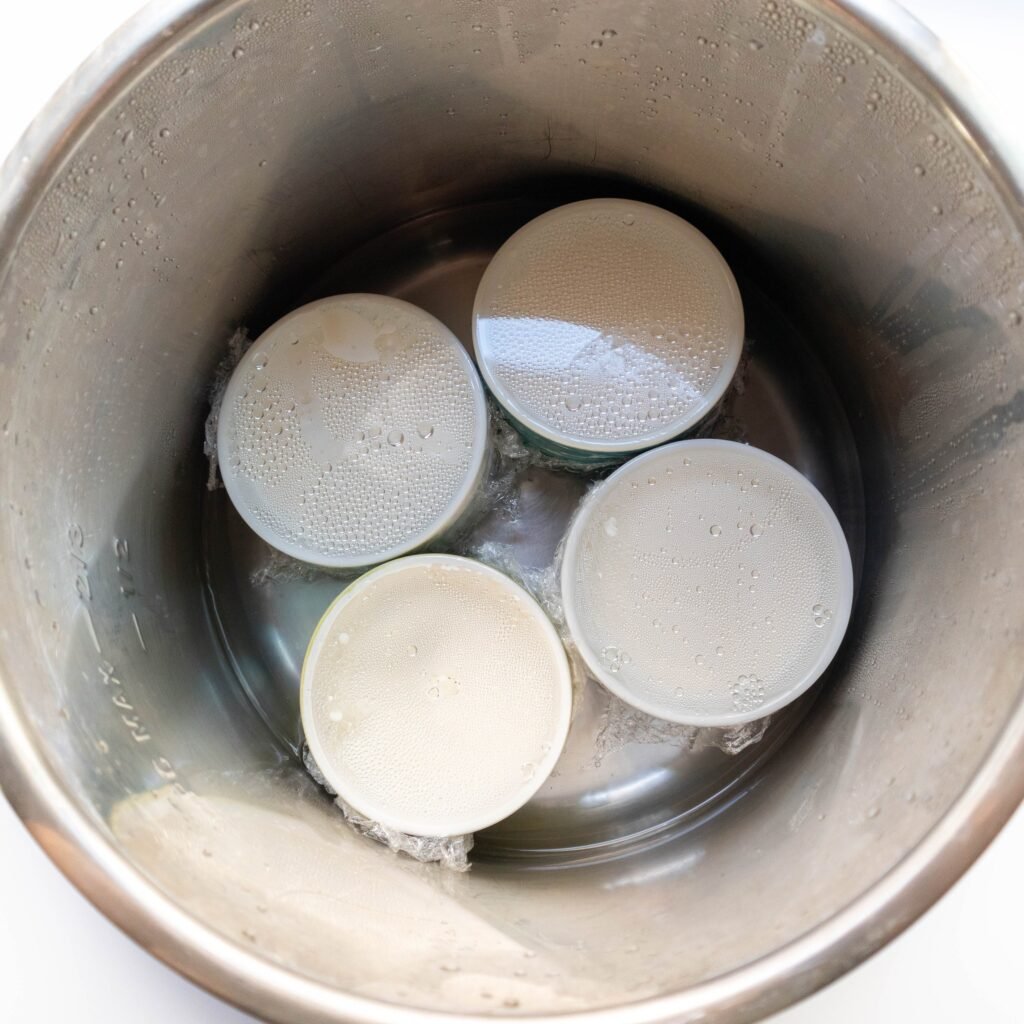
Electric cooker: Place the jars in a single layer and add warm water (around 40°C/105°F) to cover the jars two-thirds of the way. Close the lid and set the cooker to yogurt mode. Let it cook for 4 hours. To check if it’s ready, tilt a jar. When the contents are no longer liquid, the yogurt is done.
Oven method: Preheat your oven to the lowest temperature (around 175°F) for about 5 minutes. Then, turn it off. Put the jars in a deep baking dish, and add warm water to cover the jars two-thirds of the way. Place the dish on the middle rack of the oven. Cover the jars with a kitchen towel, close the oven, and let the yogurt sit for about 2 hours. After that, remove the towel and let it rest for another 2 hours.
Step 7: Cool the yogurt
Once the yogurt has set, take the jars out. Let them cool naturally on the counter. Afterward, place them in the fridge. This step deepens that sweet and tangy yogurt flavor. It also gives you that perfect chill that makes it so satisfying.
By following these steps, you’re not just making Vietnamese-style yogurt—you’re continuing a tradition passed down through generations. You can enjoy it plain or turn it into Sữa chua with fruit toppings, Vietnamese yogurt parfaits, or even a refreshing Vietnamese yogurt smoothie. Once you master this, it opens the door to fun variations like Sữa chua nếp cẩm or frozen Vietnamese yogurt!
How To Preserve or Store Yogurt (Sữa Chua/Da Ua)?
To keep Sữa chua • Vietnamese-style yogurt fresh, follow these simple steps:
Check the best before date on the package. Choose the one with the farthest date.
Refrigerate the yogurt right after buying it. Store it in the coldest part of the fridge, not in the door.
Once opened, eat the yogurt within 3 days to avoid spoilage.
Use a clean spoon to scoop the yogurt. Don’t put unused yogurt back into the original container. This helps to avoid cross-contamination.
Always seal the container tightly. This keeps out smells from other foods.
Freezing yogurt changes its texture and flavour, but if you freeze it, it will last for up to 1 month.
If you make your own yogurt, feed the seed culture after a week to keep it healthy.
Check the yogurt for mold or changes in texture.
Want tart yogurt? Leave it to ferment for 8 hours.
Rotate your yogurt in the fridge. Eat it in date order.
Advanced Tips For Making Yogurt (Sữa Chua/Da Ua)
Heating Process: Always heat the milk first, even if it’s pasteurized. This helps the milk proteins break down so the yogurt can set better. From my own tries, I’ve seen smoother and thicker results when I do this. It also helps the good bacteria grow well.
Incubation: Don’t peek while it’s setting. I know it’s hard, but opening the lid changes the heat inside. That can stop the yogurt from forming right. Wait until you see a soft wiggle—like jelly. That means it’s ready.
Stirring: Never stir during incubation. I’ve done it before, and it made the yogurt watery. Let it sit still so the cultures can work. That’s how you get that creamy, smooth texture.
Milk Freshness: Use fresh milk only. If the milk smells off, don’t use it. Old milk can change the taste and stop it from setting. I always check the date before making yogurt for friends or family.
Straining: Want it thicker? Strain the yogurt after it chills. This makes it rich and creamy. It also lowers lactose, which helps if your stomach is sensitive. I use cheesecloth for this—it’s easy and quick.
Vietnamese-style yogurt (Sữa chua) is smooth, creamy, and lightly sweet. It’s made with milk, sugar, and a touch of tang that melts in your mouth. You can enjoy it cold on a hot day or as a simple snack anytime. I’ve made this recipe many times—it’s easy, fresh, and so good!
Ingredients
1 can sweetened condensed milk
1 1/3 cup of yogurt (with probiotic/live cultures)
1 1/3 cup of room temp water
2 2/3 cups hot (not boiling) water
1 tsp vanilla extract
Instructions
1
Pour the milk into a pot. Heat it until it’s warm to the touch, not hot. You should be able to dip your finger in for a few seconds.
2
Add sugar and a few spoonfuls of plain yogurt. Stir slowly until smooth. The yogurt helps start the fermentation.
3
Pour the mix into small jars. Cover them with lids or plastic wrap. Keep them warm—like in an oven with the light on or a warm water bath.
4
Leave it for 6–8 hours until it thickens. Chill before eating. It should be creamy, sweet, and a little tangy—just like the ones I grew up making at home.
Nutrition Facts
Servings 5
Serving Size 1 cup
Amount Per Serving
Calories346kcal
% Daily Value *
Total Fat19g30%
Saturated Fat12g60%
Cholesterol75mg25%
Sodium269mg12%
Potassium825mg24%
Total Carbohydrate26g9%
Sugars26g
Protein19g38%
Vitamin A 266 IU
Vitamin C 1 mg
Calcium 680 mg
Iron 0.4 mg
Vitamin D 3 IU
Magnesium 65 mg
Copper 0.1 mg
* Percent Daily Values are based on a 2,000 calorie diet. Your daily value may be higher or lower depending on your calorie needs.
Note
Use fresh milk for the best taste and smooth texture. Avoid milk that’s been open for too long.
Keep the fermenting time steady. Around 6–8 hours is ideal for creamy, tangy yogurt.
Don’t move the jars while they set. Stillness helps the yogurt form evenly.
Once chilled, store in the fridge for up to 5 days. It tastes even better the next day!
Keywords:
Sữa chua. Vietnamese-style yogurt, Sữa chua nếp cẩm, Vietnamese yogurt with fresh fruit
Pin this recipe to share with your friends and followers.
Lauren Clark
Food and Kitchen Blogger
Hi, I'm Lauren Clark, a full-time Food and Kitchen Blogger, mother of 2 beautiful daughters and a lovely wife. I live in New Jersey with my family. I love traveling, sharing new recipes, reviewing kitchen tools, and spending time with my family.