Valentine’s Day with kids means EITHER store-bought cookies in plastic wrap OR a homemade mess that somehow becomes the best memory of the year. Always go with option two.
Tender vanilla-almond sugar cookies (the almond extract is NOT optional), crisp royal icing that actually holds a line, hearts in every shade of pink. Piping bag chaos. Best decision you’ll make all February
How to Get Royal Icing Consistency Right
Beat icing on HIGH for 1.5-2 minutes until stiff peaks stand tall without curling. Lift your beater to test the hold!
For piping details, keep it THICK. For flooding centers, add water ONE teaspoon at a time until the icing ribbons off your spoon and settles flat in 10-15 seconds (this is the flood test, and yes, timing matters).
Thick icing needs water, thin icing needs sifted sugar. Always adjust in TINY amounts only, because royal icing flips fast!
Tips for Clean, Sharp Cookie Edges
- CHILL dough 2+ hours. Cold dough cuts cleaner and holds shape better.
- Roll between parchment to exactly 1/4-inch. Skip flour dusting (dries dough, roughs edges).
- Dip cutter in sugar between cuts. No dragging!
- Press STRAIGHT DOWN, one firm motion. No twisting, no wiggling.
- Freeze cut cookies 10 minutes pre-bake. Cold cuts equal sharp edges that won’t spread.
How to Store & Gift These Cookies
- Store in an airtight container at room temperature up to ONE WEEK. Parchment between layers prevents smudges.
- Royal icing fully hardens after 24 hours…. wait before stacking!
- Freeze UNDECORATED cookies in a zip-top bag for THREE MONTHS. Thaw, then decorate (icing fresh for the win).
- Gift 4-6 cookies in clear cellophane bags tied with ribbon. Add a handwritten tag (charm counts!).
Recipes Like This One
- Valentine’s Day Jello Poke Cake
- Fruit Pizza Made With Cookie Dough
- Pecan Fig Cookies
- Angel Food Flag Cake
- Fruit Pizza with Marshmallow Fluff
- Flag Poke Cake
Estimated Nutrition
Estimated nutrition for the whole recipe (without optional ingredients):
- Calories: 3500-3700
- Protein: 22-26 g
- Fat: 110-120 g
- Carbohydrates: 610-650 g
Ingredients
For the dough:
- 2.5 cups flour (I always use King Arthur all-purpose flour)
- 1/2 tsp baking powder
- 1/4 tsp salt
- 1 cup butter (I like Kerrygold unsalted butter for this)
- 3/4 cup sugar
- 1 egg (room temperature, about 70°F)
- 2 tsp vanilla extract
- 1/2 tsp almond extract
For the royal icing:
- 4 cups confectioners’ sugar (sifted to remove lumps)
- 3 tbsp meringue powder (I use Wilton for the most consistent stiff peaks)
- 10 tbsp water
- 1/4 teaspoon fine sea salt
- 1/2 teaspoon lemon juice
- Gel food coloring
Step 1: Whisk the Dry Ingredients
- 2.5 cups flour
- 1/2 tsp baking powder
- 1/4 tsp salt
- 1 egg
Sift together the flour, baking powder, and salt in a medium bowl, breaking up any lumps.
Set aside.
This step ensures even distribution of the leavening agents throughout the dough, which gives you consistent, tender cookies.
While you’re at it, remove your egg from the refrigerator so it can come to room temperature—this helps it incorporate smoothly into the butter mixture.
Step 2: Cream Butter and Sugar
- 1 cup butter
- 3/4 cup sugar
In a large bowl, beat the softened butter and sugar together on high speed for 3 minutes until the mixture is pale, fluffy, and noticeably lighter in color.
This creaming process incorporates air into the dough, which helps your cookies rise slightly and achieve a tender crumb.
Don’t skip the full 3 minutes—it makes a real difference in texture.
Step 3: Incorporate Eggs and Extracts
- 1 egg
- 2 tsp vanilla extract
- 1/2 tsp almond extract
Add the room-temperature egg, vanilla extract, and almond extract to the creamed butter mixture.
Beat on medium speed for 1 minute until fully combined and the mixture looks smooth and emulsified.
I like to add a tiny pinch of salt here along with the extracts—it rounds out the sweetness and makes the vanilla flavor pop.
Step 4: Form the Dough
- dry ingredient mixture from Step 1
- wet ingredient mixture from Step 3
Add the dry ingredient mixture from Step 1 to the wet ingredients from Step 3, then mix on low speed just until the dough comes together.
Stop mixing as soon as you no longer see streaks of flour—overmixing develops gluten and makes cookies tough.
Turn the dough out onto a piece of parchment paper, shape it into a disk, and wrap tightly.
Refrigerate for at least 2 hours (or up to 24 hours) so the dough firms up and the flavors meld.
Step 5: Roll, Cut, and Bake
- cookie dough from Step 4
Preheat your oven to 350°F.
Remove the chilled dough from Step 4 and roll it between two pieces of parchment paper to an even 1/4-inch thickness.
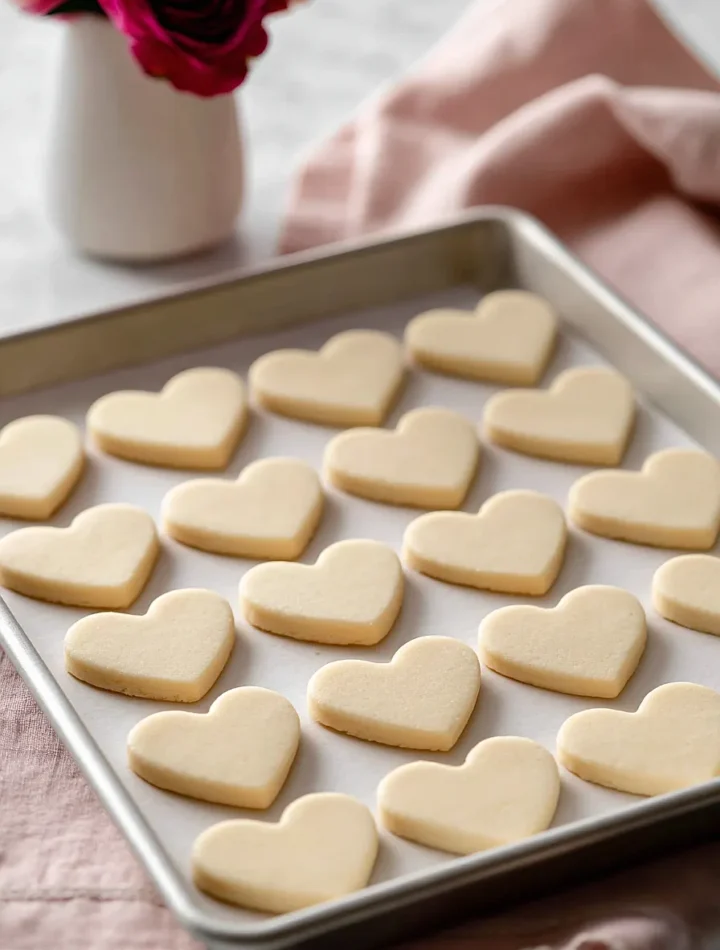
Cut into heart shapes using a cookie cutter, place on parchment-lined baking sheets about 1 inch apart, and bake for 11–12 minutes until the edges are just barely golden but the centers still look slightly underbaked.
Let the cookies cool on the baking sheet for 5 minutes, then transfer them to a wire rack to cool completely before decorating.
Step 6: Whip the Icing Base
- 4 cups confectioners’ sugar
- 3 tbsp meringue powder
- 9 tbsp water
- 1/4 tsp fine sea salt
- 1/2 tsp lemon juice
In a large bowl, combine the sifted confectioners’ sugar, meringue powder, 9 tablespoons of water, fine sea salt, and lemon juice.
Beat on high speed for 1.5–2 minutes until the icing reaches stiff peaks that hold their shape.
Start with 9 tablespoons of water; if the icing is too thick, add the remaining tablespoon one teaspoon at a time.
I use Wilton meringue powder because it gives me the most reliable, glossy results every single time.
Step 7: Tint and Pipe Designs
- royal icing from Step 6
- Gel food coloring
Divide the royal icing from Step 6 into separate bowls and tint each with gel food coloring as desired, stirring well to ensure even color.
Pipe icing borders around the edges of each cooled cookie, then fill in the centers with icing in contrasting colors or white.
Let the base layer set for 2 hours, then pipe your Valentine’s messages or designs with red icing and allow them to dry for another 2–3 hours.
The cookies are now ready to give as gifts or enjoy yourself!